Everything You Need to Know About Climbing the Mother’s Necklace
Introduction
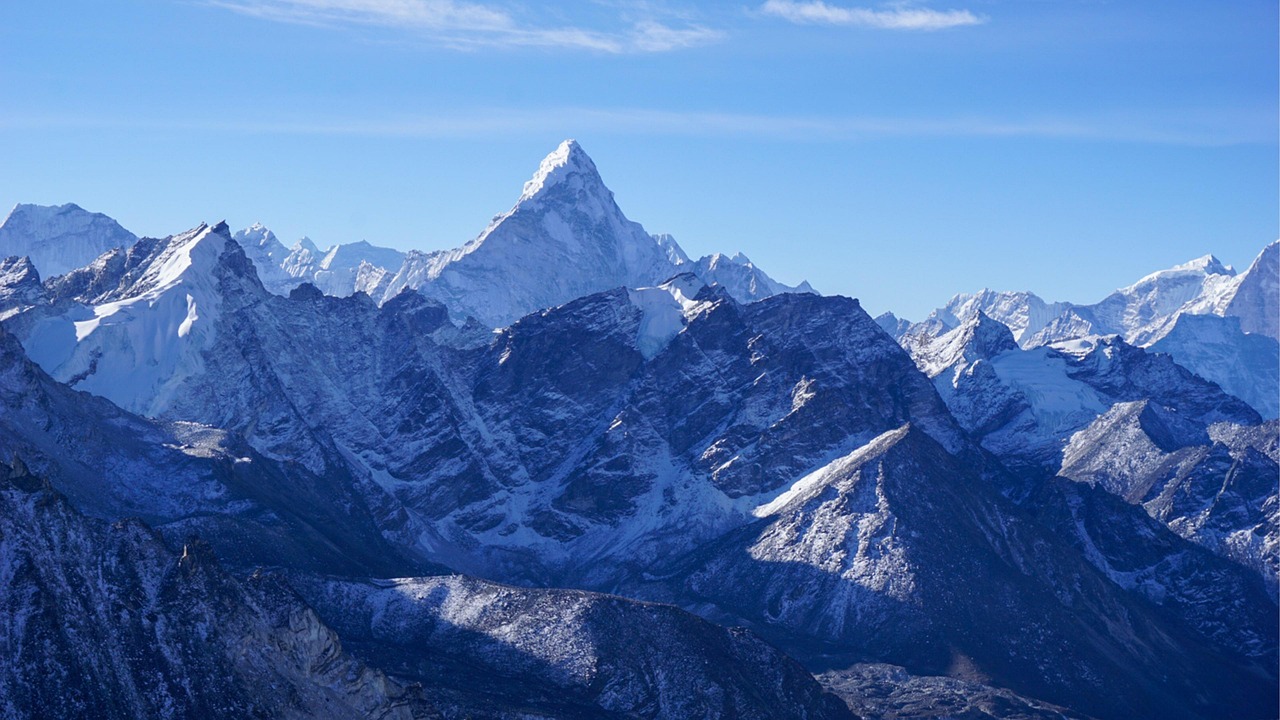
Ama Dablam is one of the most beautiful mountains in the world. Located in the Everest region of Nepal, it stands at 6,812 meters (22,349 feet) high. Local people call it “Mother’s Necklace” because the hanging glacier on its side looks like a traditional pendant.
This guide covers everything about climbing Ama Dablam – from start to finish, day by day. It includes information about equipment, costs, difficulty, weather, and why people attempt this mountain. Whether you are planning to climb or just curious, this guide will help you understand what an Ama Dablam expedition involves.
PART 1: Understanding Ama Dablam
What Does the Name Mean?
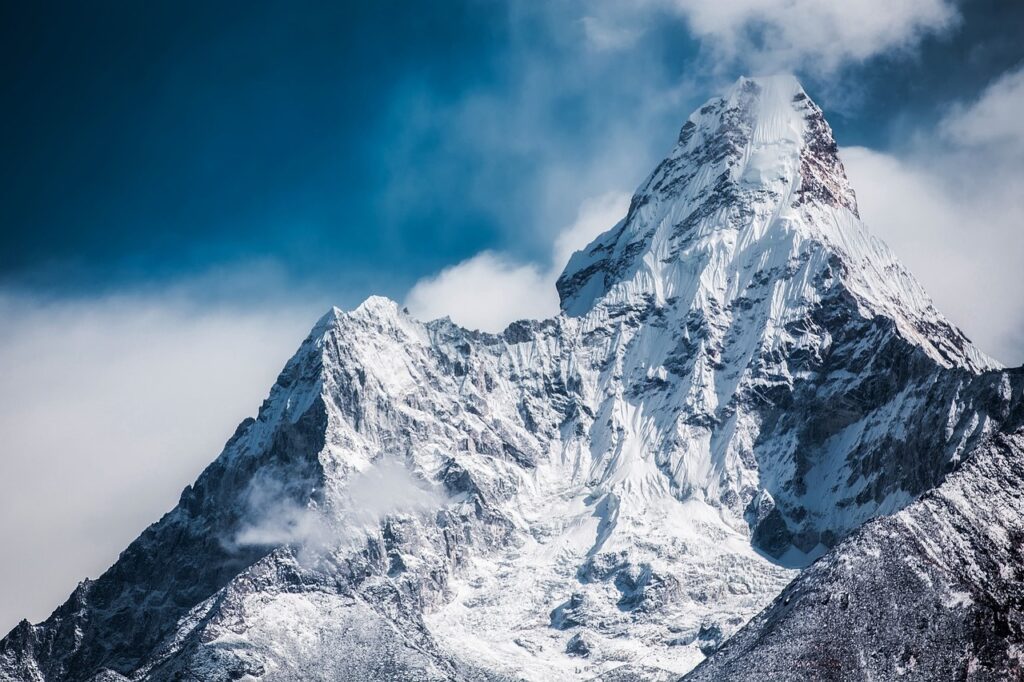
In the Sherpa language, “Ama” means mother and “Dablam” means the traditional pendant necklace that mothers wear. The hanging glacier on the mountain’s southwest face looks like this pendant. So the name means “Mother’s Necklace.”
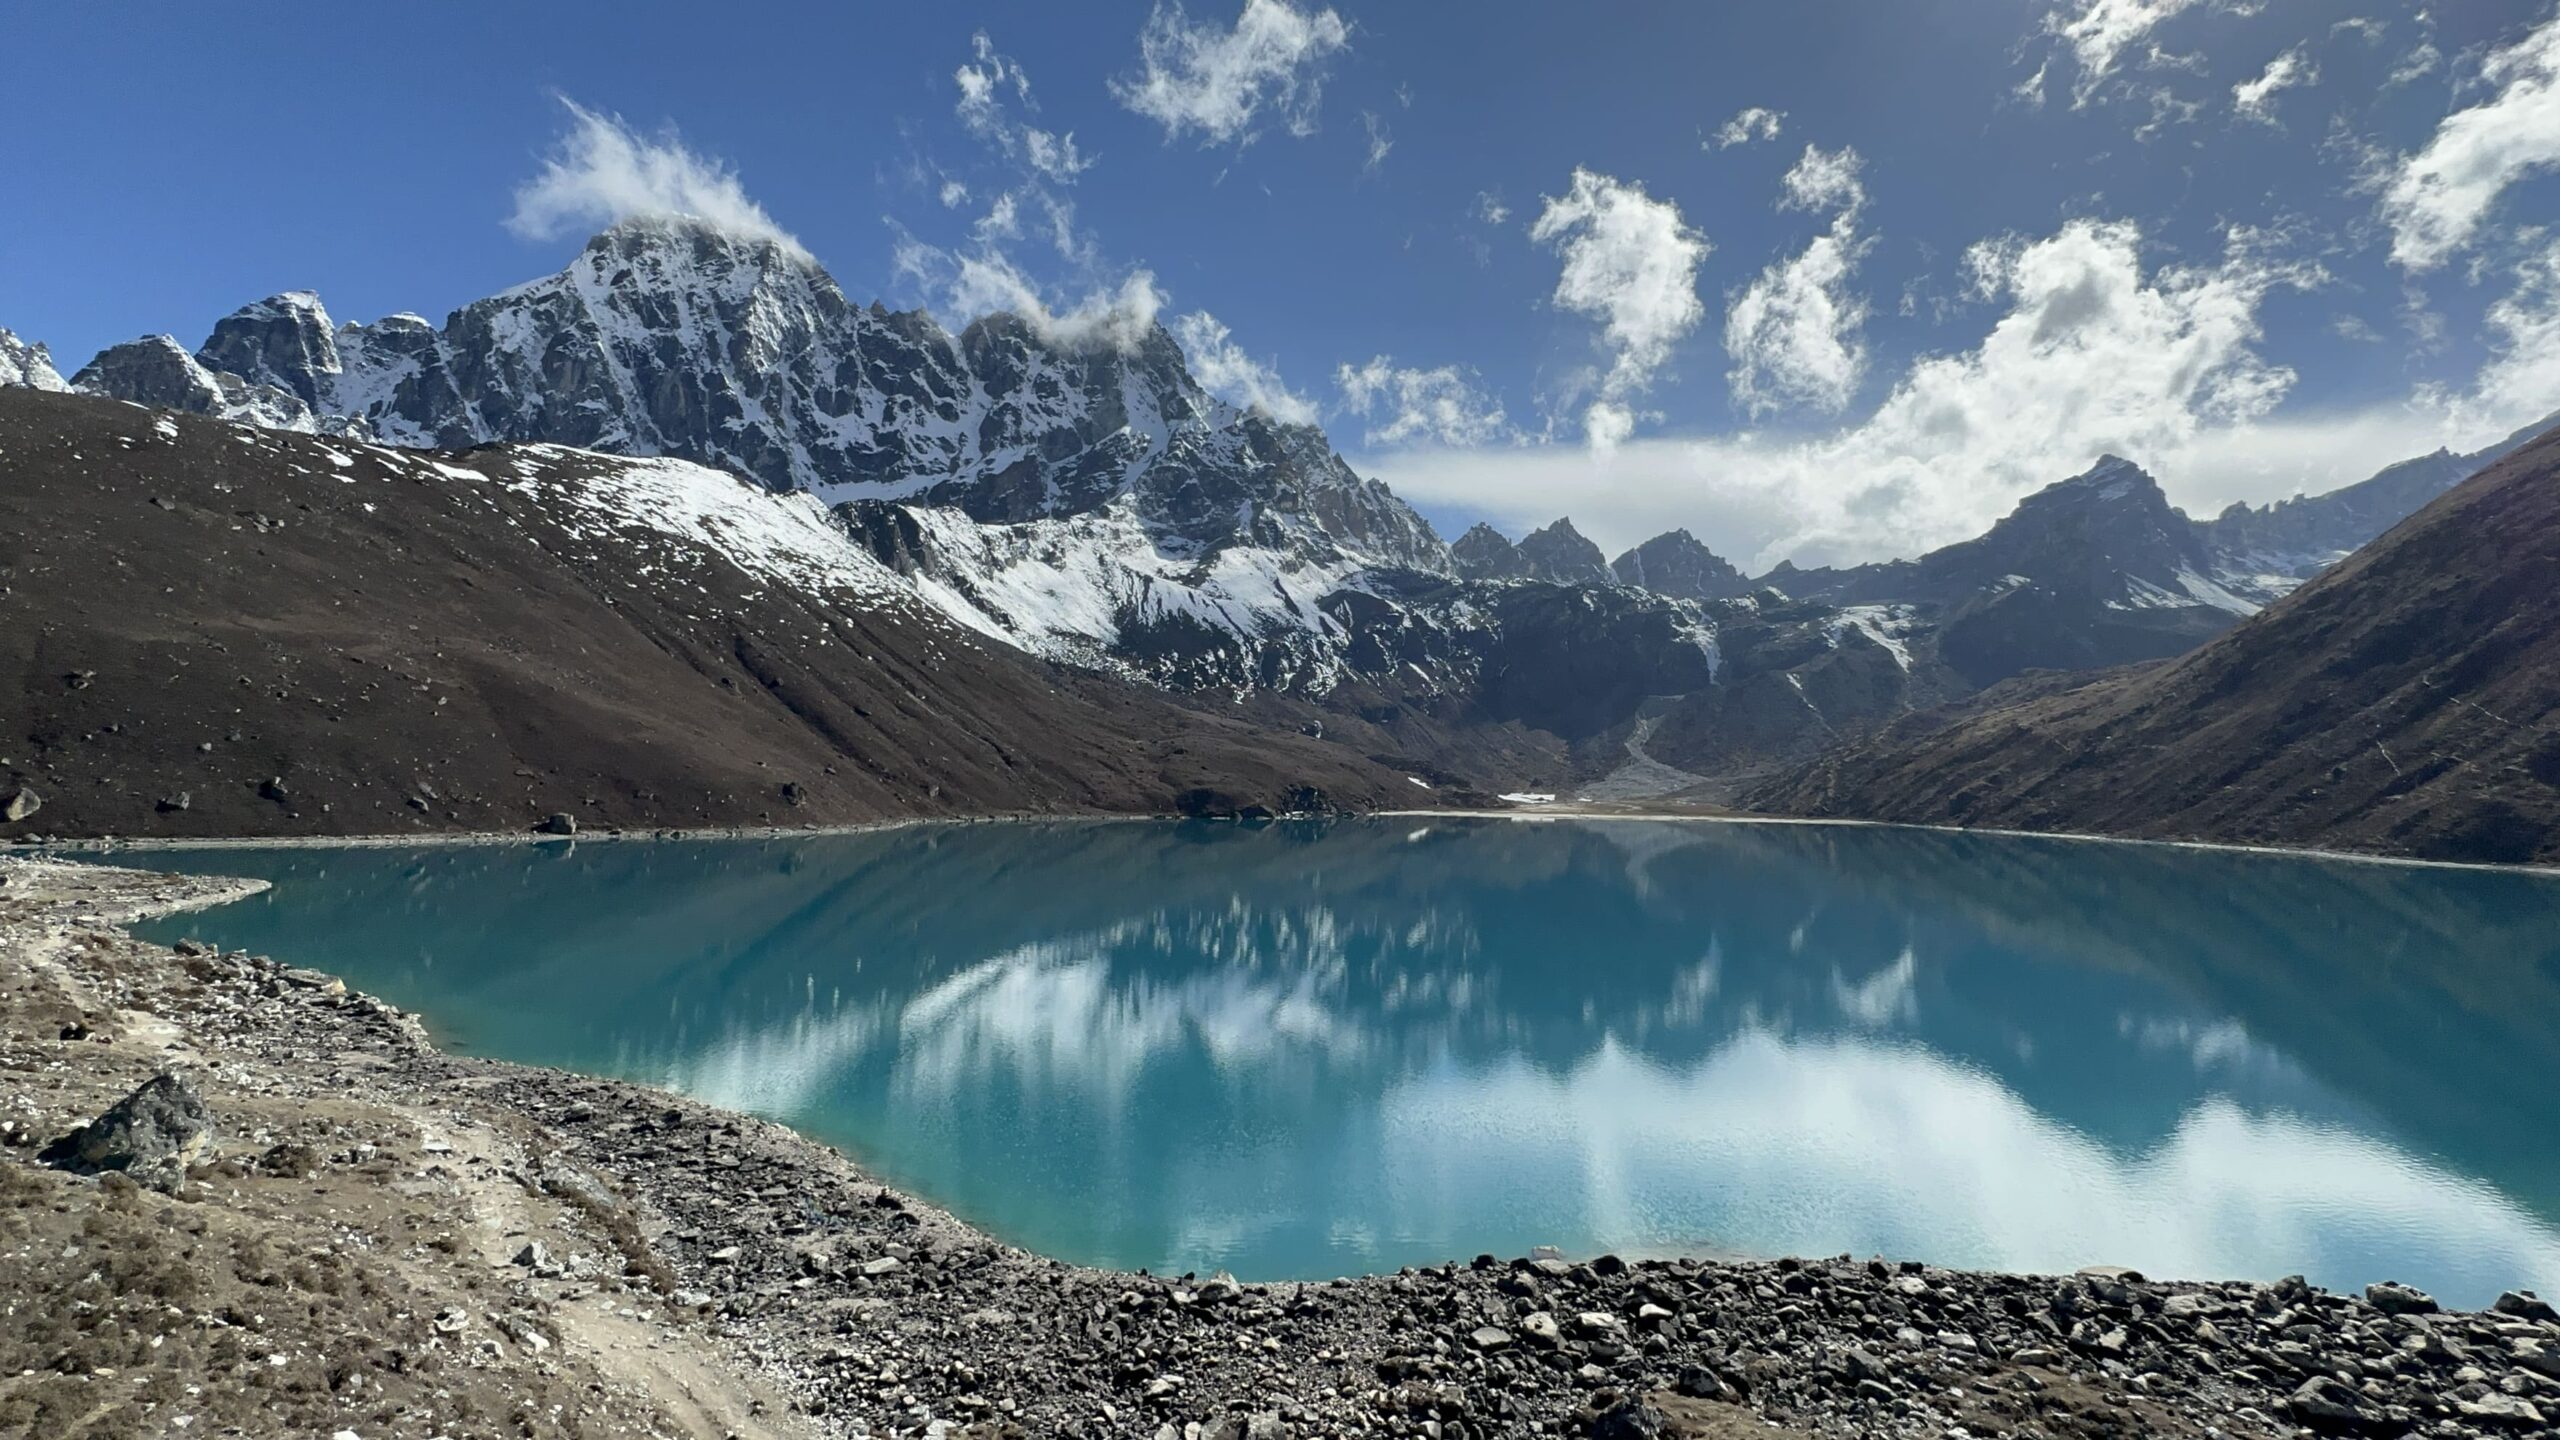
Where Is It Located?
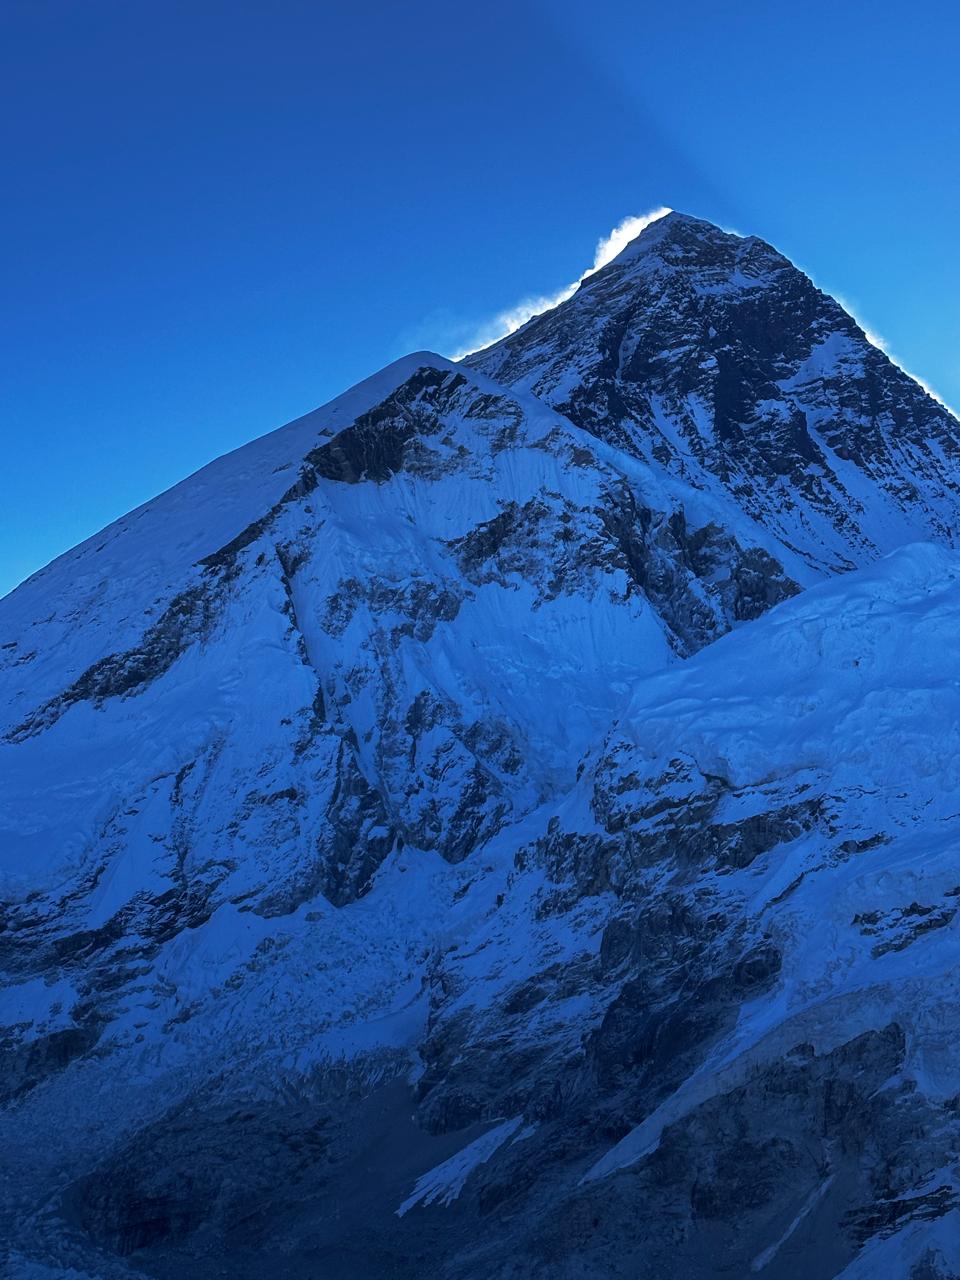
Ama Dablam is in the Khumbu region of Nepal, part of the Himalayan mountain range. It sits right next to the trail to Mount Everest Base Camp. From its summit, you can see Everest, Lhotse, Makalu, and many other famous peaks.
Why Is It Famous?
Climbers call Ama Dablam “The Matterhorn of the Himalayas” because of its beautiful shape. It has steep ridges, a sharp summit, and that distinctive hanging glacier. Many people consider it one of the most beautiful mountains in the world.
First Ascent
The first successful climb of Ama Dablam was in 1961 by a team from New Zealand and the United States. Since then, thousands of climbers have attempted it. The standard route today is the Southwest Ridge, the same route used in the first ascent.
PART 2: Why Do People Climb Ama Dablam?
People have many reasons for wanting to climb this mountain. Here are the most common ones.
The Beauty
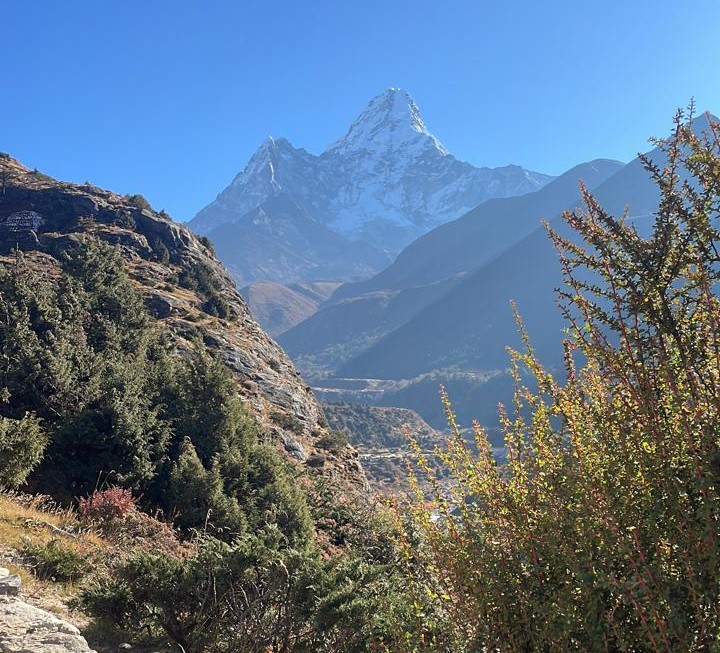
The mountain is stunning to look at. Many climbers say they first saw Ama Dablam while trekking to Everest Base Camp and knew they had to come back to climb it. The shape is perfect, the setting is dramatic, and the views from the top are incredible.
The Challenge
Ama Dablam is a real mountain climb. It requires technical skills – using crampons on ice, climbing on fixed ropes, and moving safely on steep terrain. It’s harder than trekking peaks but not as extreme as the highest Himalayan climbs. For many climbers, it’s the perfect step up to bigger mountains.
The Altitude Experience
At 6,812 meters, climbers experience serious altitude. The body has to work hard with less oxygen. This prepares people for even higher climbs like Everest or Lhotse. Many use Ama Dablam as training for 8,000-meter peaks.
The Adventure
The whole experience is an adventure – flying into Lukla, trekking through Sherpa villages, living at base camp, and climbing a beautiful mountain. Every day brings something new.
The Achievement
Standing on any mountain summit feels good. Standing on a mountain as beautiful and challenging as Ama Dablam feels even better. It’s something most people will never do, and climbers take pride in that achievement.
PART 3: How Difficult Is Ama Dablam?
Technical Difficulty
On a scale of Himalayan climbing, Ama Dablam is considered moderately difficult. Here’s what climbers face:
Rock Climbing: There are sections of rock climbing, especially the Yellow Tower near the summit. This requires using hands and feet to pull up over rocks. The climbing is not extremely hard (rated around 5.7 in climbing grades), but doing it at 6,300 meters with a heavy pack makes it much harder.
Ice Climbing: Between Camp 1 and Camp 2, there is steep ice climbing. Climbers use crampons to kick into the ice and ice axes for balance and pulling. The ice can be hard and requires good technique.
Fixed Ropes: Most of the route above base camp has fixed ropes. Climbers attach themselves to these ropes using devices called ascenders (for going up) and descenders (for going down). This makes the climb safer but still requires effort to pull yourself up.
Exposure: Many parts of the route have big drops. Looking down, you see a long way. This can be scary for people afraid of heights. Climbers must stay calm and focused.
Physical Difficulty
Climbing Ama Dablam requires good physical fitness. Here’s what the body goes through:
Long Days: Summit day can be 10-12 hours of continuous climbing. This requires endurance.
Heavy Pack: Climbers carry packs with water, food, extra clothes, and climbing gear. The pack weighs 10-15 kg.
Altitude: At 6,800 meters, there is half the oxygen compared to sea level. Every movement takes more effort. Breathing is hard. Sleep is poor. Appetite disappears.
Cold: Temperatures can drop to -30°C at night. The body burns energy just staying warm.
Mental Difficulty
The mental challenge is as big as the physical one. Climbers face:
Fear: The exposure, the risk, the unknown – all create fear. Climbers must manage this fear and keep moving.
Discomfort: Being cold, tired, hungry, and scared for days is uncomfortable. Climbers must accept this discomfort.
Decision Making: At high altitude, thinking becomes hard. But climbers must make good decisions – when to go up, when to rest, when to turn around.
Patience: The expedition takes three weeks. Climbers must be patient with the process, with the weather, with their bodies.
Who Can Climb Ama Dablam?
A person with good fitness, some climbing experience, and strong mental preparation can climb Ama Dablam. Most climbers are:
- Age 25 to 60
- In good physical shape
- Comfortable on steep terrain
- Able to handle cold and discomfort
- Willing to follow guides’ instructions
Previous climbing experience is helpful but not always required if you join a guided expedition that provides training.
PART 4: Equipment Needed
Proper equipment is essential for safety and comfort. Here is a complete list of what climbers need.
Footwear
- Climbing Boots: Insulated plastic boots or double boots rated for cold temperatures. Boots must be compatible with crampons. Popular brands include La Sportiva, Scarpa, and Millet.
- Camp Boots: Lightweight insulated boots for walking around base camp. Some climbers use down booties inside the tent.
- Trekking Shoes: Light shoes for the trek to base camp.
Climbing Gear
- Crampons: Steel spikes that attach to boots for walking on ice. They must fit your boots properly.
- Ice Axe: One technical ice axe for steep climbing. Some climbers bring two.
- Climbing Harness: A comfortable harness that fits over all clothing layers.
- Helmet: Protects from falling rocks. Essential on Ama Dablam.
- Ascender (Jumar): A device that slides up the fixed rope but locks if you fall.
- Descender (ATC or Figure 8): For controlling speed when going down ropes.
- Carabiners: 5-6 locking carabiners and several non-locking ones.
- Sling and Cord: For tying into anchors.
- Prusik Loops: For emergency rope ascending.
Clothing (Layering System)
- Base Layer: Merino wool or synthetic long underwear top and bottom. Wicks sweat away from skin.
- Mid Layer: Fleece jacket and pants for insulation.
- Insulation Layer: Down jacket and pants for extreme cold. Used at high camps and on summit day.
- Outer Layer: Waterproof and windproof shell jacket and pants. Protects from wind and snow.
Gloves:
- Thin liner gloves for dexterity
- Medium insulated gloves for general climbing
- Thick expedition mittens for extreme cold and summit
Headwear:
- Warm hat (wool or fleece)
- Balaclava or face mask
- Neck gaiter
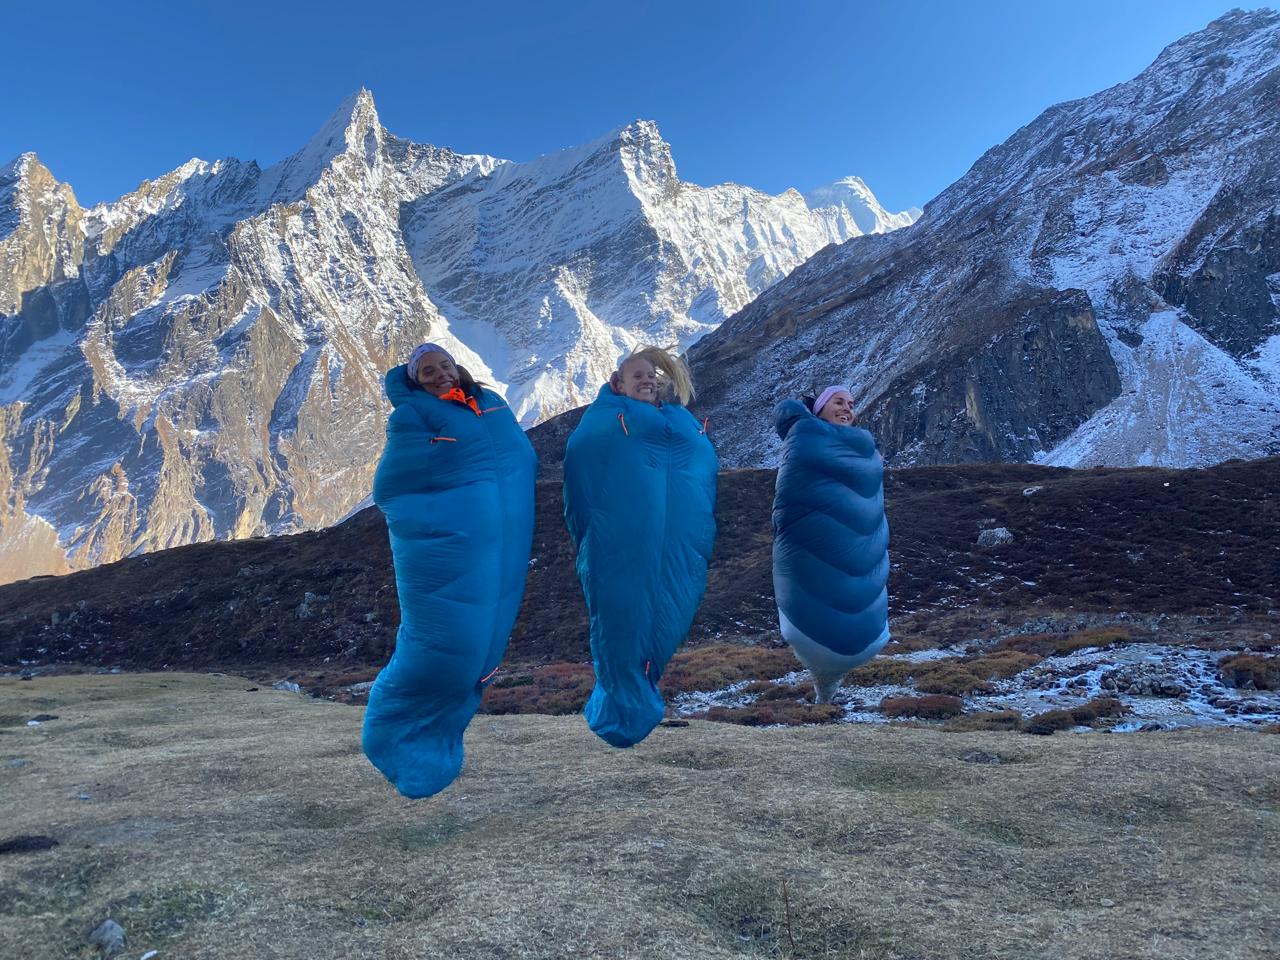
Sleeping Gear
- Sleeping Bag: Rated to at least -20°C, but -30°C is better. Down is warmer and lighter than synthetic.
- Sleeping Pad: Insulated air pad. Regular foam pads are not warm enough at high camps.
- Pillow: Small inflatable or stuff sack with clothes.
Camp and Cooking Gear
- Headlamp: With extra batteries. Essential for summit day start.
- Water Bottles: Insulated wide-mouth bottles so water doesn’t freeze. Two 1-liter bottles minimum.
- Thermos: For hot drinks at camp.
- Pee Bottle: Wide-mouth bottle for nighttime use. Essential at high camps where going outside is dangerous.
- Spoon/Bowl: For eating at base camp.
- Water Treatment: Tablets or filter for treating water.
Personal Items
- Sunglasses: 100% UV protection with side shields. Essential for snow blindness prevention.
- Goggles: For bad weather and summit day.
- Sunscreen: High SPF, water resistant.
- Lip Balm: With SPF.
First Aid Kit: Including:
- Personal medications
- Pain killers
- Blister treatment
- Altitude sickness medication (Diamox)
- Antibiotics
- Anti-diarrhea medication
Toiletries: Toothbrush, toothpaste, wet wipes, hand sanitizer, small towel.
Camera: For recording the experience.
Power Bank: For charging devices. No electricity on the mountain.
Books/Kindle: For rest days.
Documents
- Passport (valid 6+ months)
- Nepal visa (can get on arrival)
- Travel insurance certificate
- Flight tickets
- Emergency contact information
Group Equipment (Provided by Expedition Company)
- Tents at base camp and high camps
- Kitchen tent and dining tent at base camp
- Cooking equipment and fuel
- Fixed ropes on the mountain
- Communication devices (satellite phone, radio)
- Medical oxygen and mask (for emergencies)
- First aid kit and stretcher
Equipment Cost
Buying all personal equipment new costs approximately $4,000 to $6,000. Many climbers already own some items. Renting gear in Kathmandu is possible and costs less.
PART 5: Expedition Costs
Climbing Ama Dablam requires significant financial investment. Here is a breakdown of typical costs.
Guided Expedition Package
Most climbers join a guided expedition. Package prices vary based on services included:
Budget Companies: $5,000 to $7,000
- Basic services
- Smaller teams
- Simpler food and accommodation
Mid-Range Companies: $8,000 to $12,000
- Good services
- Experienced guides
- Better food and comfort
Luxury Companies: $15,000 to $25,000
- Premium services
- Western guides plus Sherpa support
- Better tents, food, and equipment
- More personal attention
What’s Included in Package
Typical inclusions:
- Airport pickup and dropoff in Kathmandu
- Hotel accommodation in Kathmandu (with breakfast)
- Welcome and farewell dinners
- Flight Kathmandu-Lukla-Kathmandu
- All meals during trek and climb
- Accommodation in tea houses during trek
- Tents at base camp and high camps
- Professional guides (Sherpas)
- Cooking staff at base camp
- Porters and yaks for gear transport
- Climbing permits and fees
- Group climbing gear (ropes, etc.)
- Emergency oxygen (for use, not for climbing)
- Satellite phone for emergency use
What’s Not Included
- International flights to Kathmandu
- Nepal visa ($50)
- Travel insurance (required)
- Personal climbing gear
- Tips for guides and staff
- Extra drinks and snacks
- Personal expenses
- Rescue costs if needed
Additional Costs
- Travel Insurance: $300 to $500 for a policy covering climbing to 7,000 meters. This is mandatory and must include helicopter rescue.
- Tips: $300 to $500 total. Distributed among guides, cooks, and porters.
- Personal Gear: $0 to $6,000 depending on what you already own.
- Extra Nights in Kathmandu: $50 to $150 per night depending on hotel.
Total Expedition Cost
A realistic total for a first-time climber, including all expenses:
- Mid-range expedition package: $10,000
- International flights: $1,500
- Insurance: $400
- Tips: $400
- Gear (if buying some new): $2,000
- Miscellaneous: $500
Total: Approximately $14,500
This can be lower if you already have gear or choose a budget company. It can be higher if you choose luxury services.
PART 6: Weather and Conditions
Climbing Seasons
There are two main climbing seasons for Ama Dablam:
Spring (March to May):
- Warmer temperatures
- Longer days
- More stable weather
- More crowded
- Some risk of afternoon snow
Autumn (October to November):
- Most popular season
- Clear skies
- Cold but stable
- Less wind than spring
- Best views
Most climbers choose autumn for the best conditions.
Temperature Ranges
Base Camp (4,570m):
- Day: 5°C to 10°C
- Night: -5°C to -10°C
Camp 1 (5,700m):
- Day: -5°C to 0°C
- Night: -15°C to -20°C
Camp 2 (5,950m):
- Day: -10°C to -5°C
- Night: -20°C to -25°C
Camp 3 (6,300m):
- Day: -15°C to -10°C
- Night: -25°C to -30°C
Summit (6,812m):
- Summit morning: -20°C to -25°C (with wind chill much colder)
- Can drop to -30°C in bad conditions
Wind
Wind is a major factor on Ama Dablam. The mountain is exposed and wind can be strong, especially at higher camps. Wind speeds of 50-80 km/h are common. Stronger winds can make climbing impossible.
Precipitation
Snow can fall at any time. Autumn generally has clear weather but afternoon clouds are common. Spring has more precipitation. Heavy snow increases avalanche risk and makes climbing harder.
Sun
The sun at high altitude is intense. UV radiation is much stronger than at sea level. Snow reflects sunlight, increasing exposure. Sunburn can happen quickly even when air temperature is cold.
Visibility
Clear mornings are common, with clouds building in afternoon. Summit day starts early to take advantage of good morning visibility and return before afternoon weather.
PART 7: Daily Life on the Expedition
Base Camp Life
Base camp is at 4,570 meters on rocky ground near the mountain. It has:
- Sleeping tents for climbers
- Kitchen tent with cooking equipment
- Dining tent with tables and chairs
- Toilet tent
- Storage tent for gear
Daily routine at base camp:
Morning:
- Wake around 7 am
- Breakfast in dining tent (porridge, eggs, bread, tea)
- Prepare for the day’s activities
Day:
- Training or acclimatization walks
- Gear maintenance
- Rest and reading
- Eating and drinking
Evening:
- Dinner in dining tent
- Team meeting about next day
- Early bed (8-9 pm)
Food on the Expedition
Expedition food is simple but plentiful:
- Breakfast: Porridge, eggs, Tibetan bread, chapati, muesli, tea, coffee
- Lunch: Noodles, soup, sandwiches, rice dishes
- Dinner: Dal bhat (rice and lentil soup), pasta, vegetables, meat dishes, dessert
- Snacks: Cookies, chocolate, nuts, energy bars, hot drinks
At higher camps, food is simpler – freeze-dried meals, soups, hot drinks.
Health and Hygiene
Staying healthy on the mountain requires attention:
- Hydration: Drinking 3-4 liters of water daily is essential. Dehydration makes altitude sickness worse.
- Hygiene: Wet wipes are used for washing. Hand sanitizer is used constantly. Toilets are basic but kept clean.
- Altitude: Most climbers feel some effects – headache, poor sleep, low appetite. These are normal. Serious symptoms require immediate descent.
Common Issues:
- Headaches
- Nausea
- Constipation
- Cough (from cold dry air)
- Sunburn
- Blisters
Communication
Most expeditions have:
- Satellite phone for emergencies (expensive for regular calls)
- Radio between camps
- Limited internet at base camp (slow and expensive)
Climbers cannot stay in regular contact with home. Families should understand this before the expedition.
PART 8: Day-by-Day Itinerary
Phase 1: Arrival and Trek to Base Camp (Days 1-8)
Day 1: Arrival in Kathmandu (1,400m)
- Arrive at Kathmandu airport
- Transfer to hotel in Thamel district
- Rest and recover from flight
- Evening welcome meeting with expedition team
- Overnight in hotel
Day 2: Kathmandu Preparation
- Final gear check with guides
- Equipment shopping if needed
- Permit paperwork
- Sightseeing optional (Boudhanath Stupa, Pashupatinath Temple)
- Expedition briefing
- Overnight in hotel
Day 3: Fly to Lukla (2,840m) and Trek to Phakding (2,610m)
- Early morning flight to Lukla (30 minutes)
- Meet porter team
- Begin trek, descending to Phakding
- Walk through forests and villages
- Cross suspension bridges over Dudh Koshi River
- Overnight in tea house
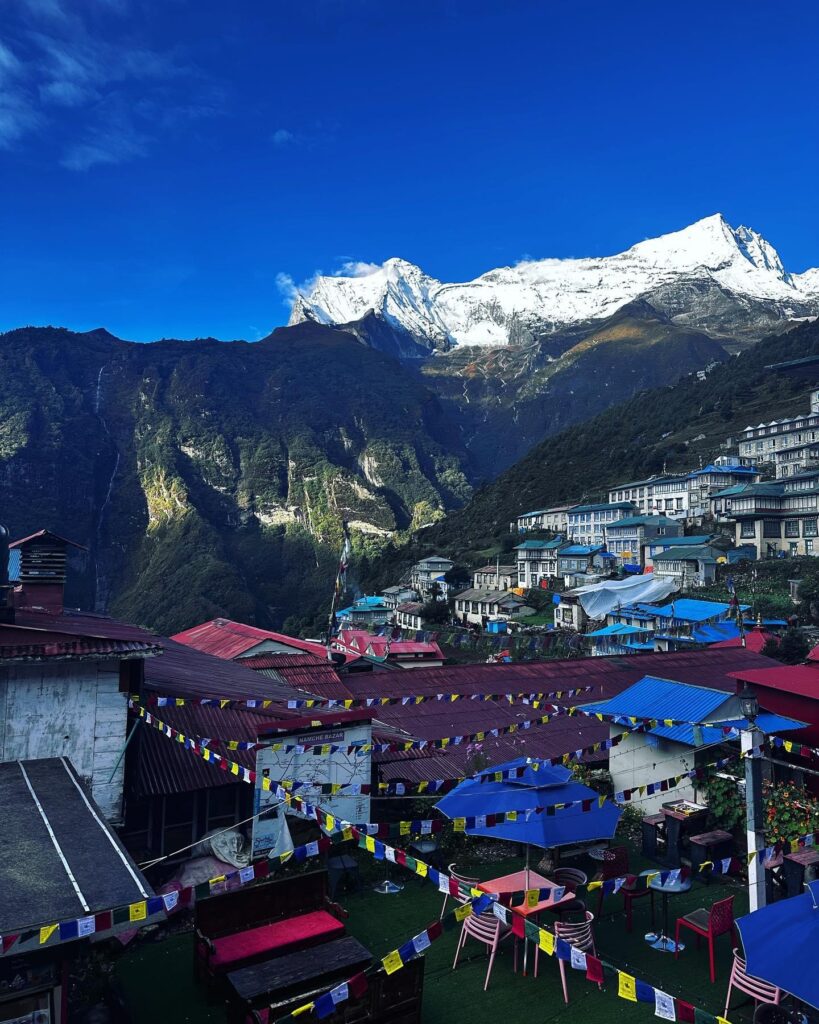
Day 4: Trek to Namche Bazaar (3,440m)
- Follow river upstream
- Climb steadily through pine forests
- First views of Everest (weather permitting)
- Enter Sagarmatha National Park
- Arrive at Namche Bazaar, main town of Khumbu region
- Overnight in tea house
Day 5: Acclimatization Day in Namche
- Rest day for altitude adjustment
- Hike to Everest View Hotel (3,880m) for better acclimatization
- Views of Everest, Lhotse, and Ama Dablam
- Visit Sherpa Culture Museum
- Rest and hydration
- Overnight in tea house
Day 6: Trek to Pangboche (3,930m)
- Leave Namche and follow main trail
- Visit Tengboche Monastery (3,867m)
- Continue through forests and villages
- Views of Ama Dablam getting closer
- Arrive at Pangboche village
- Overnight in tea house
Day 7: Trek to Ama Dablam Base Camp (4,570m)
- Leave main Everest trail
- Head toward Ama Dablam
- Final approach to base camp
- Arrive at base camp, meet support staff
- Settle into tents
- Orientation to camp facilities
- Overnight at base camp
Day 8: Rest and Preparation at Base Camp
- Rest after trek
- Organize personal gear
- Training session with guides (crampon use, rope techniques)
- Hydration and acclimatization
- Briefing on climbing plan
- Overnight at base camp
Phase 2: Acclimatization and Rotation (Days 9-14)
Day 9: Rest and Training at Base Camp
- Continued rest
- Practice climbing skills on nearby terrain
- Check all equipment
- Team meeting about upcoming rotation
- Overnight at base camp
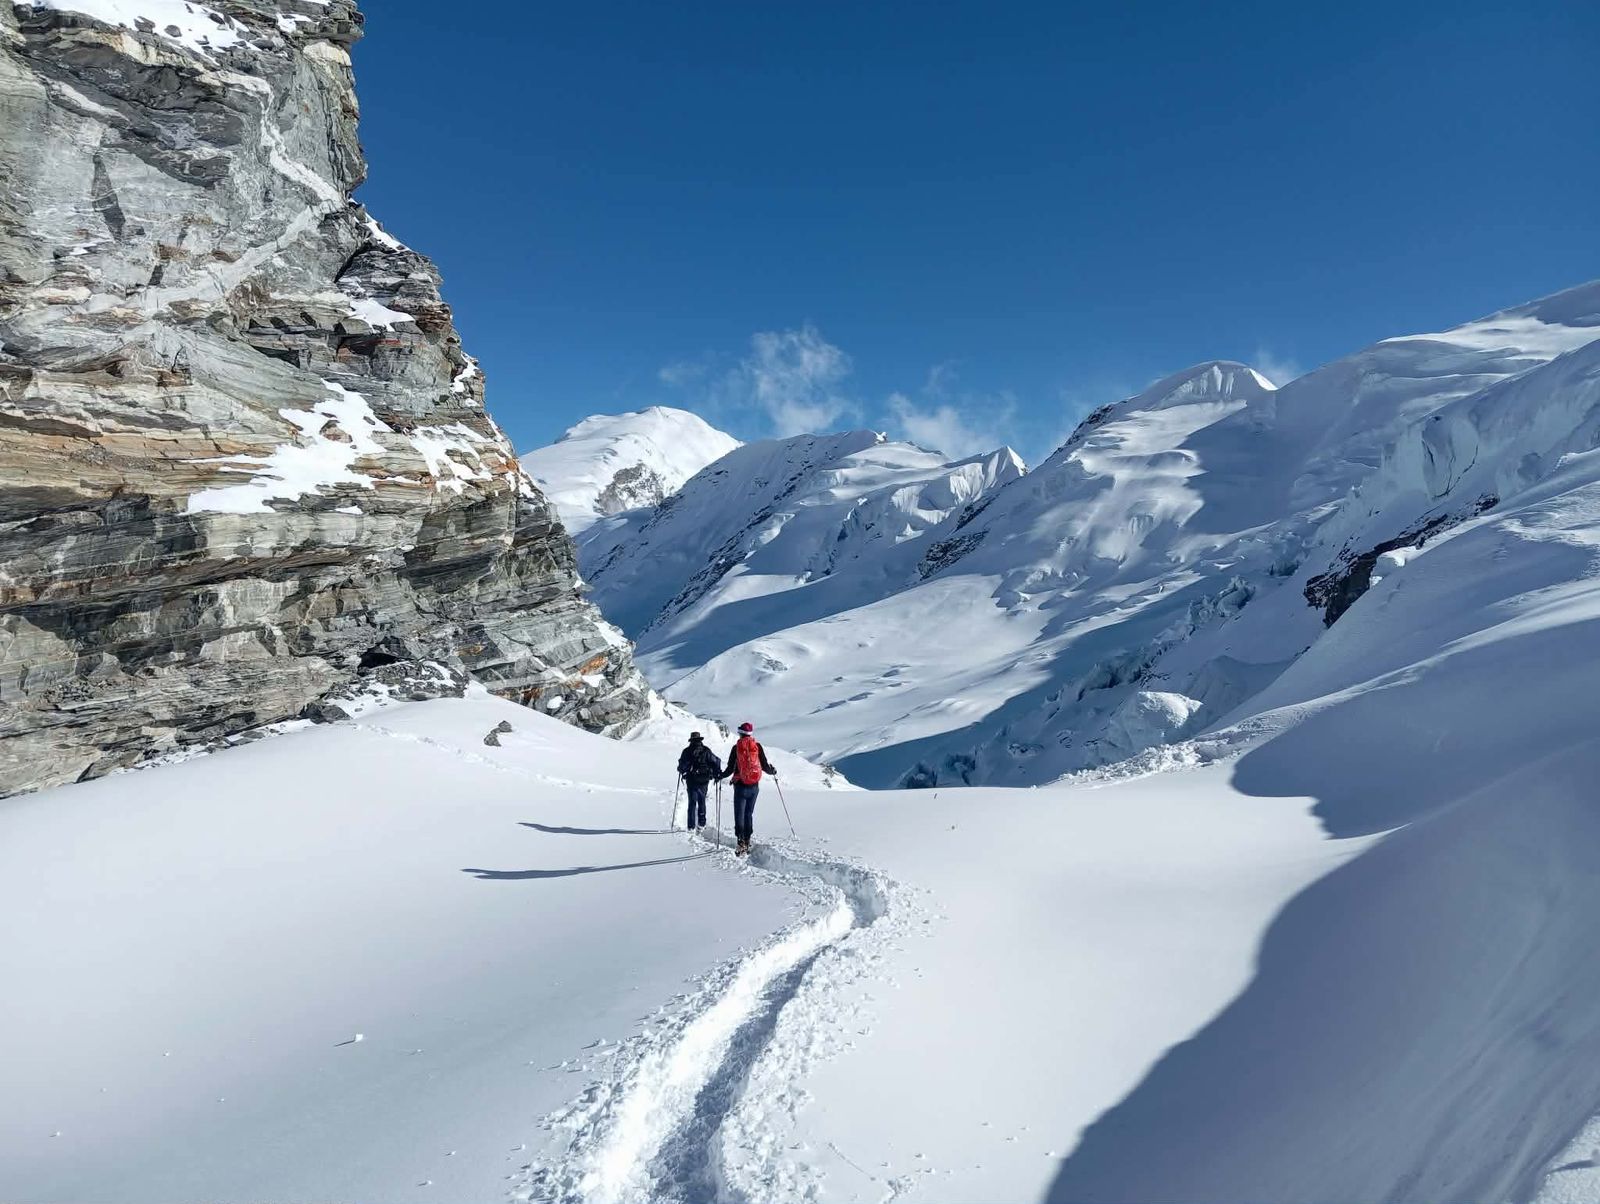
Day 10: Climb to Camp 1 (5,700m)
- Early start from base camp
- Climb through rocky moraine
- Reach fixed ropes and begin technical climbing
- Ascend to Camp 1 on small ledge
- Settle into tents
- Hydrate and rest
- Overnight at Camp 1
Day 11: Climb to Camp 2 (5,950m) and Return to Camp 1
- Continue up steep ice to Camp 2
- Experience higher altitude
- Rest at Camp 2, eat snacks
- Descend back to Camp 1
- “Climb high, sleep low” for acclimatization
- Overnight at Camp 1
Day 12: Return to Base Camp
- Descend from Camp 1 to base camp
- Rest and recover
- Eat and drink plenty
- Discuss rotation experience with guides
- Overnight at base camp
Day 13-14: Rest at Base Camp
- Complete rest days
- Eat well, drink well
- Prepare gear for summit push
- Mental preparation
- Weather monitoring
- Final briefing before summit attempt
Phase 3: Summit Push (Days 15-18)
Day 15: Move to Camp 2
- Leave base camp early
- Climb to Camp 1 (brief rest)
- Continue to Camp 2
- Settle in for summit push
- Hydrate and eat
- Early sleep
- Overnight at Camp 2
Day 16: Move to Camp 3 (6,300m)
- Wake early
- Climb steep terrain to Camp 3
- Camp 3 is on small ice ledge
- Very limited space
- Rest and prepare for summit
- Try to eat and drink
- Difficult sleep at this altitude
- Overnight at Camp 3
Day 17: Summit Day (6,812m) and Descent to Camp 2
- Wake at 2 am
- Put on all clothing
- Headlamp on, harness on
- Start climbing at 3 am
- Climb through dark, very cold
- Reach Yellow Tower (rock climbing section)
- Continue to summit ridge
- Reach summit around 8-9 am
- Short time on summit for photos
- Begin descent immediately
- Down to Camp 3 (brief rest)
- Continue down to Camp 2
- Arrive Camp 2 afternoon/evening
- Collapse into tent
- Overnight at Camp 2
Day 18: Descent to Base Camp
- Wake at Camp 2
- Pack up and descend
- Down to Camp 1
- Continue to base camp
- Arrive base camp afternoon
- Celebration with team
- Rest and recovery
- Overnight at base camp
Phase 4: Return to Kathmandu (Days 19-22)
Day 19: Trek to Pangboche
- Leave base camp
- Trek back to Pangboche
- More oxygen, easier walking
- Hot shower at tea house
- Celebration dinner
- Overnight in tea house
Day 20: Trek to Lukla
- Continue descent
- Pass through Namche Bazaar
- Final section to Lukla
- Last night in mountains
- Team dinner
- Overnight in tea house
Day 21: Fly to Kathmandu
- Early morning flight from Lukla
- Arrive Kathmandu
- Hotel check in
- Hot shower, real bed
- Free time for shopping
- Farewell dinner with team
- Overnight in hotel
Day 22: Departure
- Transfer to airport
- Flight home
- Expedition complete
PART 9: Risks and Safety
Objective Hazards
These are dangers from the mountain itself:
- Avalanche: Ama Dablam has some avalanche risk, especially after fresh snow. Routes are chosen to avoid avalanche paths.
- Rockfall: Rocks fall from cliffs above. Helmets are essential at all times on the mountain.
- Crevasse: Some crevasses exist on the route. Fixed ropes and careful navigation reduce risk.
- Weather: Sudden storms can make climbing impossible or dangerous. Good forecasts and conservative decisions are essential.
Subjective Hazards
- These are dangers from human factors:
- Altitude Sickness: Can affect anyone regardless of fitness. Symptoms range from mild headache to life-threatening conditions. Immediate descent is the only treatment for severe cases.
- Decision Making: Poor decisions – pushing too hard, ignoring symptoms, bad weather judgment – cause many accidents.
- Equipment Failure: Gear can break or be used incorrectly. Proper maintenance and training reduce this risk.
Safety Measures on Expeditions
- Good expeditions have multiple safety measures:
- Fixed Ropes: The route is equipped with fixed ropes that climbers clip into for security.
- Experienced Guides: Sherpa guides know the mountain well and make good decisions.
- Communication: Radios between camps allow coordination and emergency response.
- Emergency Oxygen: Available at base camp for serious altitude sickness.
- Emergency Plans: Guides have plans for evacuation if needed.
- Acclimatization Schedule: Slow ascent allows bodies to adjust to altitude.
When to Turn Back
Successful climbers know when to turn back. Reasons include:
- Weather deteriorating
- Feeling sick with altitude symptoms
- Exhaustion affecting judgment
- Route conditions too dangerous
- Time running late (must turn around by set time)
Turning back is not failure. It’s smart decision making that allows you to climb another day.
PART 10: Training for Ama Dablam
Physical Training
Good physical preparation is essential. Training should start 6 months before the expedition.
Cardiovascular Fitness:
- Running 3-4 times per week, building to 10-15 km
- Cycling for endurance
- Stair climbing with weighted pack
- Hiking on weekends with elevation gain
Strength Training:
- Leg strength: squats, lunges, step-ups
- Core strength: planks, sit-ups
- Upper body: pull-ups, push-ups for rope climbing
Specific Preparation:
- Practice with climbing gear if possible
- Train at altitude if you live near mountains
- Hike with your expedition pack weight
Sample Training Schedule (Last 3 Months)
- Monday: Rest or light stretching
- Tuesday: Run 8-10 km + core workout
- Wednesday: Gym session (legs and upper body) + stair climber 30 minutes with pack
- Thursday: Run 8-10 km
- Friday: Gym session (full body) + stair climber 30 minutes with pack
- Saturday: Long hike 4-8 hours with heavy pack (15-20 kg)
- Sunday: Rest or easy walk
Mental Preparation
Mental training is as important as physical:
- Research: Learn about the mountain, the route, what to expect.
- Visualization: Imagine yourself climbing successfully, handling challenges calmly.
- Acceptance: Understand there will be discomfort, fear, and hard moments. Accept this ahead of time.
- Flexibility: Be ready for plan changes due to weather or conditions.
Skills to Learn
Before the expedition, learn:
- How to use crampons on ice and snow
- How to use an ice axe for balance and self-arrest
- How to use ascenders and descenders on ropes
- How to tie basic climbing knots
- How to layer clothing for cold conditions
- How to manage altitude symptoms
Many expedition companies offer training courses or can recommend where to learn these skills.
PART 11: Frequently Asked Questions
How long does the expedition take?
The full expedition from arrival in Kathmandu to departure takes about 3 weeks (21-24 days).
What is the success rate?
With good guides and proper preparation, success rates are 70-80%. Weather is the main factor affecting success.
Can beginners climb Ama Dablam?
“Beginners” need definition. Complete novices should not attempt Ama Dablam. But climbers with some experience and good fitness can succeed with guided support.
Do I need previous high altitude experience?
Previous high altitude experience helps but is not essential if you follow the acclimatization schedule and listen to your body.
How cold does it get?
At high camps, temperatures can drop to -30°C at night. Summit morning is usually -20°C to -25°C with wind chill making it feel colder.
Is there internet or phone service?
Limited and expensive. Some base camps have satellite internet. Higher camps have no service. Families should expect limited communication.
What if I get sick?
Guides monitor everyone for altitude sickness. Mild cases are managed with rest and medication. Severe cases require immediate descent. Expeditions have emergency plans and communication for rescue.
Can I rent gear in Kathmandu?
Yes. Many shops in Thamel rent climbing gear. Quality varies, so check carefully. For critical items (boots, crampons), many climbers prefer to bring their own.
What is the best season?
Autumn (October-November) is most popular for stable weather and clear skies. Spring (March-May) is also possible but has more variable weather.
How much does it cost?
Total cost including all expenses is typically $12,000 to $18,000 depending on expedition choice and gear needs.
PART 12: Environmental and Cultural Considerations
Leave No Trace
Climbers should minimize their impact on the mountain:
- Pack out all trash
- Use established toilet facilities
- Leave campsites clean
- Respect wildlife
Respect Local Culture
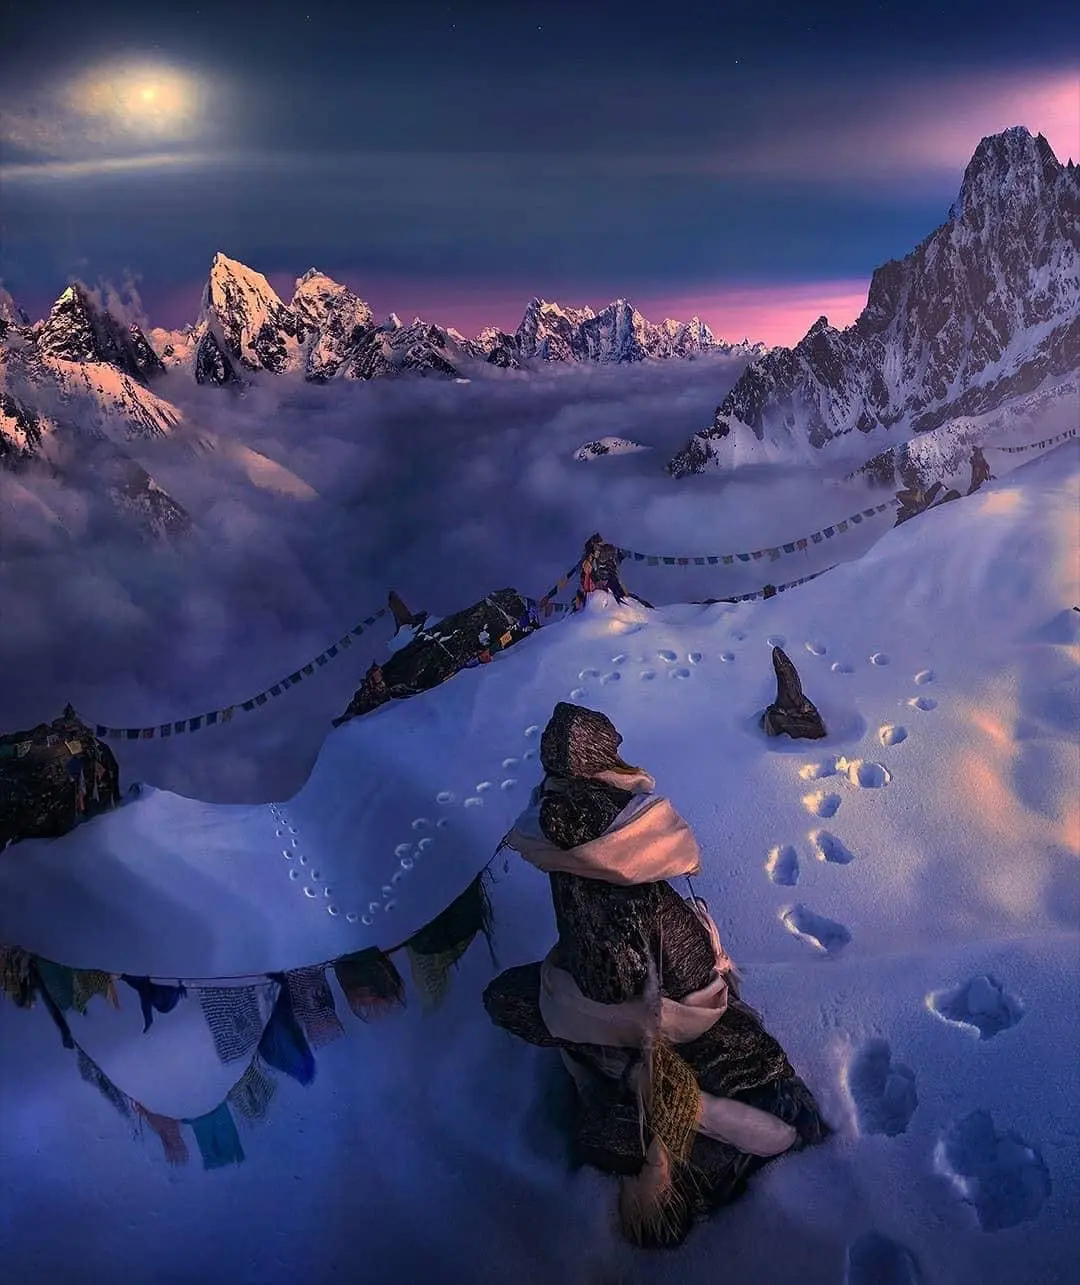
The Khumbu region is home to the Sherpa people with rich Buddhist traditions:
- Walk clockwise around stupas and mani walls
- Remove hats inside monasteries
- Ask permission before photographing people
- Learn a few words of Nepali or Sherpa (Namaste = hello, Dhanyabad = thank you)
- Respect local customs and dress modestly in villages
Supporting Local Communities
Expeditions provide employment for many local people – guides, porters, cooks, yak handlers. This is an important part of the local economy. Tipping staff appropriately acknowledges their hard work.
Summary
Climbing Ama Dablam is a significant undertaking that requires preparation, fitness, and commitment. The rewards are unforgettable – standing on one of the world’s most beautiful mountains, surrounded by the greatest peaks on earth.
This guide has covered everything needed to understand what an Ama Dablam expedition involves. From equipment and costs to daily life and risks, the information here provides a complete picture of this remarkable adventure.
For those considering the climb: prepare well, choose a good expedition company, respect the mountain, and enjoy every moment of the journey.
For those just curious: thank you for reading. May this guide help you appreciate what climbers experience on this beautiful mountain.
This guide was created from general expedition knowledge and multiple climber accounts. Individual experiences may vary based on weather, conditions, and expedition choices.
Respect nature and local culture
Climbers should honor the Himalayan environment and Sherpa traditions by minimizing waste, following sustainable practices, and showing respect for local customs, ensuring the journey is responsible and culturally mindful.
Namaste