Upper Mustang Tiji Festival Jeep Tour – 12 Days Complete Guide (2026)

Introduction: A Journey to the Forbidden Kingdom

Imagine standing within the ancient mud-brick walls of Lo Manthang, the last remaining Tibetan Buddhist kingdom, as masked monks whirl in sacred dance while centuries-old drums echo through the arid Himalayan desert. This is the Upper Mustang Tiji Festival —a three-day spectacle of faith, myth, and cultural preservation that draws travelers from across the globe.

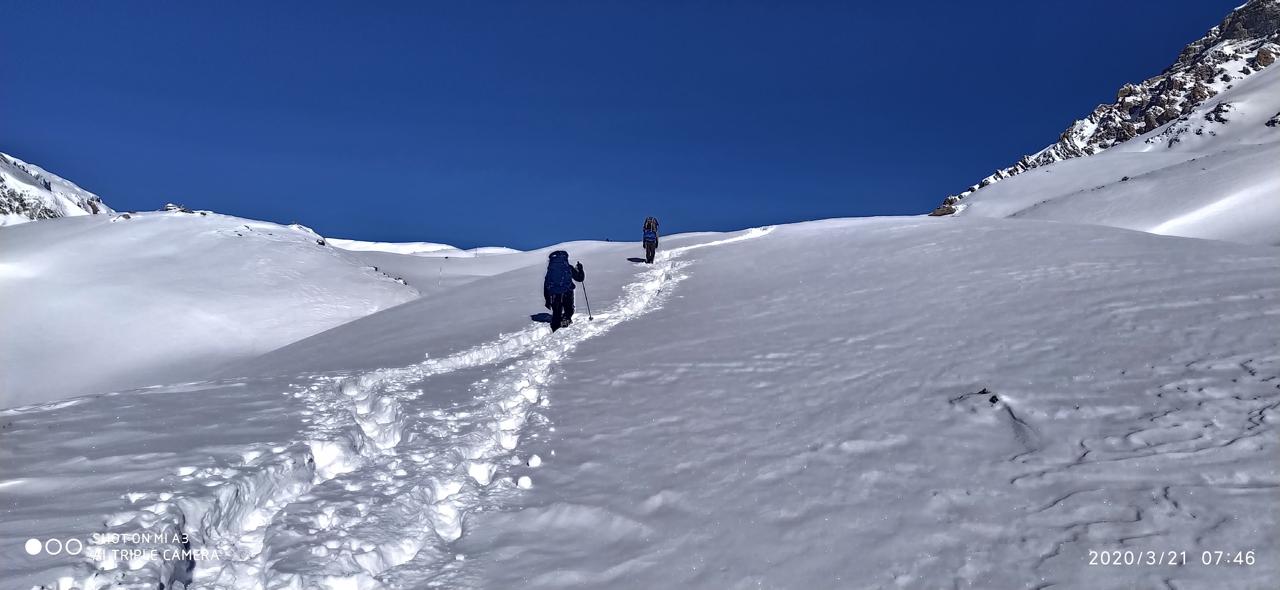
The 12-day Upper Mustang Tiji Festival Jeep Tour offers the perfect blend of cultural immersion and off-road adventure. Unlike traditional trekking, this journey takes you through Nepal’s most remote landscapes in the comfort of a 4WD jeep, making the forbidden kingdom accessible without sacrificing the thrill of exploration .

What is the Tiji Festival?

The Tiji Festival, also known as Tenchi, is an ancient Buddhist ritual celebrated annually in Lo Manthang, Upper Mustang. The name derives from Tenpa Chirim, meaning “benefit of Buddha’s teachings and all sentient beings” .

The Myth Behind the Festival

The festival reenacts a captivating mythological story: centuries ago, a demon created havoc in the Mustang region, causing severe water shortages in this already arid land. Dorje Jono (also called Vajrakila or Vajrakumar), a deity in Vajrayana Buddhism, was forced to fight his own demonic father to save the kingdom. After an epic battle, Dorje Jono emerged victorious, banishing the demon and restoring peace and prosperity .

Historical Significance

The Tiji Festival traces its origins to the early 15th century, introduced by Khenchen Sonam Lhundrup, son of Mustang’s second king. It was later revived in the 17th century by King Samdup Rabten and Sakya master Ngawang Kunga Sonam, who performed special Vajrakila rituals for peace and protection. The tradition was restored again in 1963 and continues uninterrupted to this day .

When is Tiji Festival 2026?

The Tiji Festival follows the Tibetan lunar calendar and typically falls in May. For 2026, the festival will be celebrated on:

Date Day

  • May 14, 2026 First Day
  • May 15, 2026 Second Day
  • May 16, 2026 Third Day

Plan your arrival in Lo Manthang by May 13, 2026, to settle in before the festivities begin.

What Happens During the Three Days?

Day 1 – The Opening Rituals: The festival begins with monks from Chhode Monastery performing preliminary rituals. A massive traditional thangka (religious painting) nearly the height of a two-story building is displayed from the King’s Palace—a highlight visible only during Tiji .

Day 2 – The Sacred Dances: Masked monks perform intricate cham dances, symbolizing the preparation for battle against negative forces. Each dance step represents elements of Vajrakila meditation practice .

Day 3 – The Victory & Purification: The final day features the climactic reenactment of Dorje Jono’s victory. Monks dramatically cast out tormas (ritual cakes) to symbolically banish negativity and evil spirits from the region, based on astrological guidance. The celebration concludes with feasting and community gatherings .

Why Choose the Jeep Tour Over Trekking?

  • Feature Jeep Tour Trekking
  • Physical Difficulty Easy – suitable for all ages Moderate to Strenuous
  • Duration 12 days 15-18 days
  • Max Altitude 3,950m (Lo La Pass) Similar but slower ascent
  • Comfort 4WD vehicle, lodge stays Walking daily, lodge stays
  • Best For Cultural focus, time-limited travelers Adventure seekers, hikers
  • The Jeep Tour eliminates the physical strain of long-distance trekking while still allowing you to experience the rugged beauty of Upper Mustang. You’ll cover more ground, visit more villages, and arrive in Lo Manthang well-rested for the festival .

Detailed 12-Day Itinerary

Day 1: Arrival in Kathmandu (1,350m)
Upon arrival at Tribhuvan International Airport, your tour representative will greet you and transfer you to your hotel in Thamel, Kathmandu’s vibrant tourist hub. Spend the afternoon exploring the bustling streets, handicraft shops, and cozy cafes. In the evening, attend a briefing session where your guide will explain the journey ahead, share insights about the Tiji Festival, and answer any questions .

Day 2: Kathmandu to Pokhara (822m) – 25-min Flight
Take a scenic 25-minute flight from Kathmandu to Pokhara. Choose a window seat for breathtaking views of the Annapurna, Dhaulagiri, and Machhapuchhre (Fishtail) mountain ranges. Upon arrival, check into your hotel and enjoy a free afternoon. Options include:

A relaxing boat ride on Phewa Lake

Visiting the World Peace Pagoda for sunset views

Exploring Lakeside’s shops and restaurants

Day 3: Pokhara to Tatopani (1,190m) – 5-6 Hours Drive
Your jeep adventure begins! Depart Pokhara in a sturdy 4WD jeep, following the Kali Gandaki River—one of the deepest gorges in the world. The road winds between the Annapurna and Dhaulagiri massifs, offering spectacular mountain views at every turn. Arrive at Tatopani, famous for its natural hot springs. Soak in the mineral-rich waters to soothe travel fatigue—locals believe these springs have healing properties .

Day 4: Tatopani to Kagbeni via Jomsom & Muktinath (2,850m) – 5-6 Hours Drive
Today’s journey takes you deeper into the valley. Stop at Marpha, a charming Thakali village renowned for its apples, apple pies, and apple brandy. Continue to Jomsom, the district headquarters, before taking a detour to Muktinath Temple (3,710m)—a sacred pilgrimage site for both Hindus and Buddhists. Witness pilgrims bathing under 108 water spouts and lighting butter lamps. End the day at Kagbeni, the official gateway to Upper Mustang, where your permits will be checked .

Day 5: Kagbeni to Charang (Tsarang) – 4-5 Hours Drive
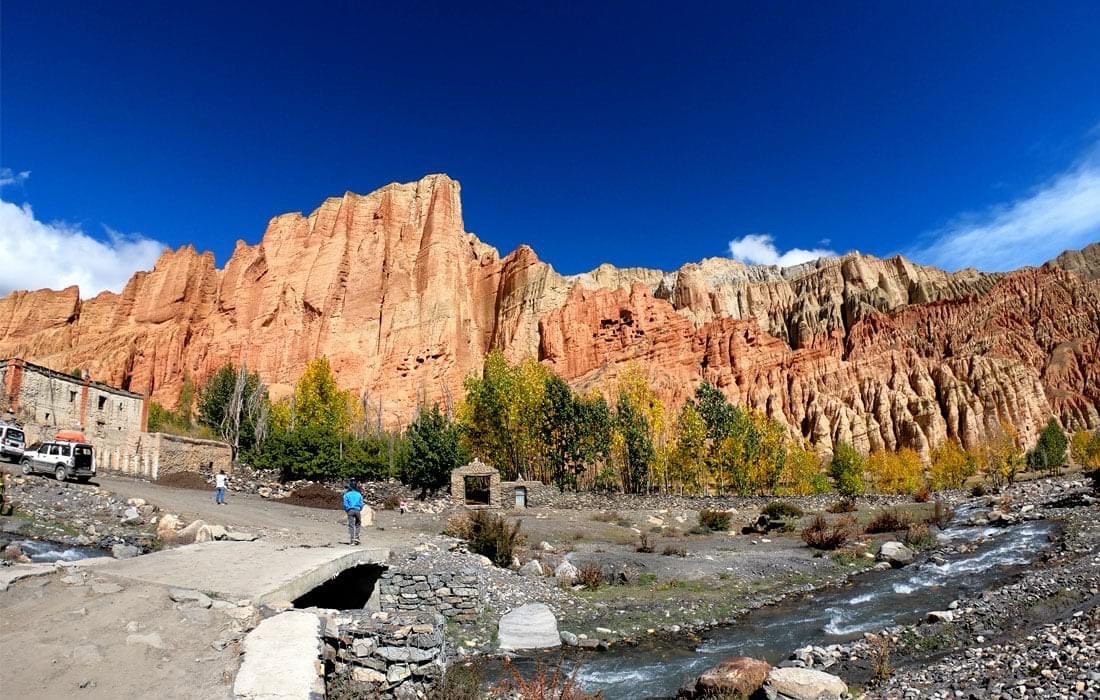
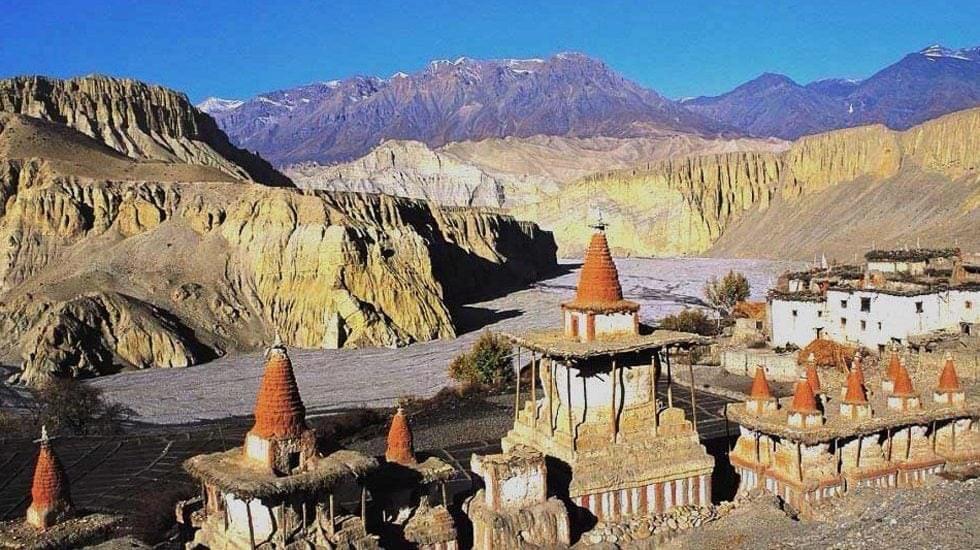
Enter the restricted Upper Mustang region—a landscape that transforms into a surreal desert plateau of red, ochre, and grey cliffs dotted with ancient caves and stupas. Visit Chhusang, Samar, and Ghiling en route. Arrive at Charang (3,560m), a village with a rich history. Explore its ancient monastery and fortress-style houses that reflect Tibetan architectural influence .

Day 6: Charang to Lo Manthang (3,810m) – 2-3 Hours Drive
A short but unforgettable drive brings you to Lo Manthang, the walled capital of the former Kingdom of Lo. Pass the longest mani wall in Upper Mustang and marvel at the stark, beautiful landscape. Upon arrival, check into your lodge and take a preliminary walk through the ancient city. Visit the King’s Palace, a five-story whitewashed structure—though currently not open for interior visits, the exterior is magnificent .

Day 7-9: Three Days of Tiji Festival Celebration (3,810m)
Three full days are dedicated to experiencing the Tiji Festival in all its glory:

Day 7 (Festival Day 1): Attend the opening ceremonies at the monastery courtyard. Witness the display of the giant thangka and observe monks preparing the sacred space. Visit Namgyal Gompa and Tingkhar village in the morning before the afternoon rituals begin.

Day 8 (Festival Day 2): Explore Chhoser village and its famous sky caves—ancient cliff dwellings carved into the rock face. If you’re lucky, you might spot blue sheep along the way. Return to Lo Manthang for the afternoon’s masked dances and ceremonies.

Day 9 (Festival Day 3): The festival’s grand finale! Witness the dramatic expulsion of the tormas (ritual cakes), symbolizing the banishment of evil. Explore Champa Lhakang (a temple with a massive Buddha statue) and the Thubchen Gompa with its exquisite mandala paintings. Join locals in the final celebrations.

Day 10: Lo Manthang to Jomsom (2,720m) – 5-6 Hours Drive
Bid farewell to Lo Manthang and begin the return journey. Retrace your route through Charang, Ghami, and Kagbeni, where permits are again checked. Arrive in Jomsom by evening. Enjoy exploring the local market, sampling apple products, and perhaps tasting local apple whiskey .

Day 11: Jomsom to Pokhara (822m) – 7-8 Hours Drive
Descend from the high-altitude desert back to the lush greenery of the Pokhara Valley. The return drive offers a different perspective on the landscapes you crossed earlier. Check into your hotel and enjoy a relaxing evening by Phewa Lake .

Day 12: Pokhara to Kathmandu – 8-9 Hours Drive or Flight
Drive back to Kathmandu (205 km) following the Trishuli and Marsyangdi Rivers. Alternatively, take a short flight back. Upon arrival, transfer to your hotel. Spend your final evening shopping for souvenirs or enjoying a farewell dinner .

Permits & Costs for 2026

Upper Mustang Restricted Area Permit – Important 2026 Update!
Starting 2026, the permit structure for Upper Mustang has been significantly revised:

Previous System New System (2026 Onwards)
USD 500 for fixed 10 days (regardless of stay) USD 50 per person per day
No flexibility Pay only for days you actually spend in Upper Mustang
This change makes shorter trips more affordable and offers greater flexibility for customized itineraries .

Important Regulations:

  • A minimum of two participants in a group is still required
  • A government-licensed guide is mandatory throughout your stay in Upper Mustang

Other Permits Required:

  • Annapurna Conservation Area Permit (ACAP)
  • TIMS Card (Trekkers’ Information Management System)

Tour Costs for 2026

Typical costs for a 12-day Upper Mustang Tiji Festival Jeep Tour:

Group Size Cost Per Person (USD)

  • 1 person $2,499 – $3,200
  • 2 persons $2,199 – $2,299
  • 3-4 persons $1,899 – $2,199
  • 5+ persons $1,699 – $1,999

Note: Prices vary by operator and inclusions. Group tours are generally more affordable .

What’s Typically Included:

  • Airport transfers
  • Accommodation (3-star hotels in cities, tea houses/lodges during the tour)
  • All meals during the tour (breakfast, lunch, dinner)
  • English-speaking licensed guide
  • 4WD jeep with experienced driver
  • All permits (Upper Mustang Special Permit, ACAP, TIMS)
  • Guide’s salary, insurance, and expenses

What’s Not Included:

  • International airfare
  • Nepal visa fee
  • Travel insurance (mandatory)
  • Personal expenses (snacks, beverages, souvenirs)
  • Tips for guide and driver
  • Extra nights in Kathmandu due to itinerary changes

Preparation Guide

Physical Preparation
While the jeep tour is rated Easy, you’ll still be at high altitudes (up to 3,950m) and may do short walks to monasteries and villages. Being in good general health is recommended. No intense training is required .

Packing List Essentials

Clothing:

  • Warm layers: fleece jacket, down jacket (temperatures can drop below freezing at night)
  • Waterproof/windproof outer shell
  • Comfortable walking shoes/boots
  • Thermal underwear
  • Hat, gloves, and scarf
  • Sun hat and sunglasses

Other Essentials:

  • Water bottle with purification tablets/filter (plastic bottles are discouraged)
  • High SPF sunscreen and lip balm
  • Personal medications and basic first aid
  • Power bank (electricity can be unreliable)
  • Headlamp/flashlight
  • Camera with extra batteries
  • Cash (ATMs are unavailable in Upper Mustang)

Documents:

  • Passport with at least 6 months validity
  • Nepal visa (available on arrival at KTM airport)
  • Travel insurance documents
  • Passport photos for permits

Acclimatization Tips

  • Drink plenty of water throughout the journey
  • Avoid alcohol during the first few days at altitude
  • Walk slowly and listen to your body
  • Inform your guide immediately if you experience headache, nausea, or dizziness

Cultural Etiquette & Responsible Tourism

Respecting Local Customs

  • Photography: Always ask permission before photographing people, especially monks and during religious ceremonies. Photography may be restricted inside monasteries and during certain rituals.
  • Dress Modestly: When visiting monasteries or during the festival, cover shoulders and knees. Remove shoes before entering temple buildings.
  • Circumambulation: Walk around stupas, mani walls, and monasteries in a clockwise direction.
  • Pointing: Avoid pointing your feet at people or religious objects.

Environmental Responsibility

  • No plastic bottles: Use reusable water bottles. Most lodges offer boiled water for a small fee.
  • Leave no trace: Carry out what you carry in.
  • Support local economy: Buy from local shops and eat at local establishments .

Frequently Asked Questions

  1. Is the Tiji Festival Jeep Tour suitable for children?
    Yes, the tour is rated Easy and suitable for children aged 5 and above, provided they are in good health .
  2. What is the maximum altitude on this tour?
    The highest point is Lo La Pass at 3,950 meters (12,959 feet). Lo Manthang itself is at 3,810 meters .
  3. How is the road condition?
    The roads are rugged—expect a bumpy but thrilling ride. 4WD jeeps are specially equipped for these conditions .
  4. What about mobile and internet connectivity?
    Mobile service is available in Pokhara and Jomsom but is limited or absent in Upper Mustang. WiFi is available at some lodges for a fee .
  5. Do I need travel insurance?
    Yes, travel insurance is mandatory. Ensure your policy covers high-altitude travel (up to 4,000m) and emergency evacuation .
  6. What is the best time to visit Upper Mustang?
    May is ideal because of the Tiji Festival. April-October generally offers good weather, with May being particularly pleasant .

Conclusion

The Upper Mustang Tiji Festival Jeep Tour is more than a vacation—it’s a once-in-a-lifetime opportunity to witness a living tradition that has survived for over 800 years in one of the world’s most remote and culturally rich regions. From the dramatic landscapes of the Kali Gandaki Gorge to the sacred dances within Lo Manthang’s ancient walls, every moment of this 12-day journey is imbued with wonder and meaning.

With the new permit system for 2026 making travel more flexible and affordable, there’s never been a better time to embark on this adventure. Whether you’re a culture enthusiast, a photographer, or simply a curious traveler, the Tiji Festival awaits.

Island Peak Climbing Guide: Imja Tse 6,189m

Namaste well come to Nepal Dreaming of climbing Island Peak? Our comprehensive guide covers everything from permits and cost to the grueling summit day, gear checklists, and vital safety tips for this classic Himalayan trekking peak.

Introduction: The Island in the Sky

There is a moment just before dawn, high on a frozen ridge, when the world’s highest mountains begin to glow. You are clipped into a fixed rope, your breathing steady but labored in the thin air, as the first rays of sunlight set fire to the iconic peak of Ama Dablam. Behind you, the immense bulk of Lhotse and the summit of Everest itself pierce the jet-black sky. Below, the valley is a sea of ice and cloud. You are not just trekking; you are climbing. You are on Island Peak .

Locally known as Imja Tse, Island Peak (6,189m / 20,305ft) is one of Nepal’s most coveted “trekking peaks.” Its name is wonderfully descriptive: from the village of Dingboche, it appears as a solitary island emerging from a frozen ocean of ice and rock . For many adventurers, it represents the perfect bridge—a transition from avid trekker to technical mountaineer.

While often described as an “easy” 6,000-meter peak, that is a relative term in the Himalayas. This climb demands respect, preparation, and a healthy dose of courage. It combines the stunning cultural immersion of the Everest Base Camp (EBC) trek with a genuine mountaineering challenge: glacier travel, crevasses, and a steep headwall that requires the use of crampons and jumars .

Whether you are a seasoned hiker looking for your first taste of altitude or an aspiring Everest summiteer using this as a training ground, this guide will walk you through every step of the journey. We will cover the nitty-gritty of costs and permits, the physical and mental preparation required, and what it actually feels like to stand on that tiny summit, surrounded by the giants of the Khumbu.

Chapter 1: Understanding the Mountain – Difficulty, Seasons, and Statistics

Before you book a flight, it is vital to understand what you are signing up for. Island Peak is graded PD (Peu Difficile / A Little Difficult) on the Alpine grading system, with a “+” for the final headwall . But what does that actually mean for you?

1.1 Technical Difficulty

The climb is not technically extreme, but it is undeniably challenging.

  • The Approach: The journey involves trekking for over a week just to reach Base Camp. This is as much a test of endurance as the climb itself.
  • Glacier Travel: From High Camp, you will navigate the Imja Glacier. This involves walking on snow and ice, often roped up, navigating around crevasses .
  • The Headwall: The crux of the climb is a 100-meter ice wall, often called the “Yellow Tower.” Depending on conditions, the slope can reach 45 to 80 degrees . This is where you will use a jumar (ascender) on fixed lines to pull yourself up. For many, this is the most thrilling and intimidating part of the climb.
  • The Summit Ridge: Once over the headwall, you traverse a narrow, exposed knife-edge ridge to the summit. The drop on either side is severe, but the fixed ropes provide security .

1.2 The Best Time to Climb

Choosing the right season is critical for success.

  • Spring (March to May): This is the most popular season. The weather is generally stable, temperatures are warmer, and the famous rhododendrons are in bloom at lower elevations. However, the trails are busier, and the climbing permit costs are higher .
  • Autumn (September to November): Offers crystal-clear skies and fantastic visibility. It is colder than spring, especially on summit day, but the winds are often lighter, and the crowds have thinned out .
  • Winter & Monsoon: Climbing during the winter (Dec-Feb) is possible but brutally cold with high winds. The monsoon (June-Aug) brings heavy snow and rain, making the route dangerous and unlikely to be attempted .

1.3 Fatality Rate and Safety

It is important to address the elephant in the room: risk. Island Peak has a low fatality rate (less than 1%), making it statistically safer than many other Himalayan peaks . However, deaths do occur, and they are almost always due to three factors:

  1. Altitude Sickness (AMS, HACE, HAPE): The number one cause of serious incidents. Climbers ignore symptoms and push for the summit .
  2. Falls: Slipping on the ice wall or ridge due to poor crampon technique or exhaustion.
  3. Objective Hazards: Unpredictable weather, hidden crevasses, or serac falls .

The takeaway: This is a real mountain. Success is not guaranteed, and safety requires humility. Listen to your body, listen to your guide, and be willing to turn back.

Chapter 2: Preparing for the Push – Training and Acclimatization

You cannot “tourist” your way up Island Peak. You need to be an athlete. The fitter you are, the more you will enjoy the experience, and the safer you will be.

2.1 The Physical Training Regimen

Start training at least 3 to 6 months before your departure . Your training should mimic the demands of the climb: long duration, with a loaded pack.

  • Cardiovascular Endurance: The summit push takes 10-14 hours. You need a massive aerobic base.
  • Activities: Long-distance running, cycling, swimming. Aim for 4-5 sessions a week.
  • Stairmaster/Stair Climbing: This is your best friend. Do this with a weighted backpack (10-15kg) for 1-2 hours at a time .
  • Strength Training: Focus on muscular endurance, not just power.
  • Legs: Lunges, squats, step-ups.
  • Core: Planks, leg raises. A strong core is essential for balance on uneven terrain with a heavy pack.
  • Back and Shoulders: Rows and deadhangs to prepare for carrying a pack and using jumars on ropes .
  • Weekend Hikes: Get out on the trails with your weighted pack. Practice walking uphill for 6-8 hours to condition your feet and mind.

2.2 Technical Skills

You don’t need to be a rock star, but you must be proficient in basic mountaineering skills. Your guide will hold a training session at Base Camp, but prior knowledge is a huge advantage.

  • Cramponing: Learn to walk without tripping, and how to kick your front points into a steep slope.
  • Rope Skills: Be comfortable using a jumar (ascender) to go up a fixed line, and an ATC or Figure-8 to rappel down. Know how to tie a Prusik knot for safety .
  • Ice Axe Arrest: Know how to stop yourself if you fall on a snow slope.

2.3 The Art of Acclimatization

The itinerary is designed around one thing: getting your body used to the lack of oxygen.

  • The Golden Rule: Climb High, Sleep Low: You will spend days hiking to a higher altitude and then descending back to camp to sleep. This stimulates your body to produce more red blood cells .
  • Hydrate, Hydrate, Hydrate: You need to drink 4-5 liters of water per day. Dehydration feels like altitude sickness and vice versa. Don’t let that happen .
  • Medication: Many climbers use Diamox (Acetazolamide) to help prevent AMS. Consult your doctor about dosage and potential side effects (it makes your fingers and toes tingle) .
  • Listen to Your Body: Know the symptoms of AMS (headache, nausea, dizziness), HAPE (fluid in lungs, gurgling breath), and HACE (fluid in the brain, loss of coordination, confusion). The only real cure for severe altitude sickness is descent .

Chapter 3: The Paperwork – Permits, Costs, and Red Tape

Climbing in a National Park requires a lot of official documentation. Most of this is handled by your trekking agency, but it is wise to know the costs involved.

3.1 Required Permits

You cannot just show up and climb. You need:

  1. Island Peak Climbing Permit: Issued by the Nepal Mountaineering Association (NMA). The cost varies by season: $250 in Spring, $125 in Autumn .
  2. Sagarmatha National Park Entry Fee: $30 per person .
  3. Khumbu Pasang Lhamu Rural Municipality Fee: A local tax of $20 .
  4. TIMS Card (Trekkers’ Information Management System): $10 .
  5. Garbage Deposit: A $500 deposit is required, which is refunded when you prove you’ve brought your waste back from the mountain .

3.2 Total Cost Breakdown

So, how much does it actually cost? For a full-service, guided expedition, you can expect to pay between $2,450 and $3,500 .

What’s Included (in a typical package):

  • Domestic flights (Kathmandu – Lukla – Kathmandu)
  • 3 nights hotel in Kathmandu
  • Teahouse accommodation during the trek
  • All meals (breakfast, lunch, dinner) on the trail
  • Experienced, licensed trekking and climbing guides (Sherpa)
  • Porter service for your main duffel bag
  • All permits and fees listed above
  • Group climbing gear (ropes, ice screws)
  • Base Camp tent accommodation (dining tent, kitchen tent)

What’s NOT Included (Your additional budget):

  • International flights to Nepal ($800 – $1,200)
  • Nepal Visa ($50 for 30 days)
  • Travel Insurance (Mandatory, must cover helicopter evacuation up to 7,000m)
  • Personal climbing gear (boots, harness, etc.)
  • Tips for guides and porters ($150 – $200 is standard)
  • Hot showers, battery charging, Wi-Fi on the trail
  • Lunches and dinners in Kathmandu

Chapter 4: The Journey – A Day-by-Day Itinerary

The magic of Island Peak is the journey to get there. Here is a typical 17-day itinerary that blends the classic EBC trek with the climb.

Part 1: The Trek In

  • Days 1-2: Kathmandu (1,400m): Arrival, gear checks, and last-minute shopping in the bustling streets of Thamel .
  • Day 3: Fly to Lukla (2,860m) & Trek to Phakding (2,610m): The infamous landing at Lukla airport is an adventure in itself. A short, easy walk to Phakding to start the trek.
  • Day 4: Trek to Namche Bazaar (3,440m): A steep uphill day crossing high suspension bridges, culminating in your first view of Everest.
  • Day 5: Acclimatization Day in Namche: Hike to the Everest View Hotel for your first panorama of the giants. Rest is crucial here .
  • Day 6: Trek to Tengboche (3,867m): A beautiful descent and final climb to the famous Tengboche Monastery, with stunning views of Ama Dablam.
  • Day 7: Trek to Dingboche (4,360m): Entering the high alpine zone. The trees disappear, replaced by scrub and massive mountain views.
  • Day 8: Acclimatization Day in Dingboche: A short hike up the ridge behind the village to help adaptation .
  • Day 9: Trek to Chhukung (4,730m): A short walk further up the valley. This is your launching point for the mountain.

Part 2: The Climb

  • Day 10: Trek to Island Peak Base Camp (5,100m): A few hours walk across moraine to a makeshift campsite at the foot of the glacier. In the afternoon, your guides will give a training session on using crampons, ice axes, and jumars .
  • Day 11: Base Camp to High Camp (5,600m): A steep, grueling climb up a rocky moraine to High Camp. This is a basic camp on the glacier itself. Go to bed early; the summit push starts soon .
  • Day 12: Summit Day (6,189m) and return to Chhukung: The biggest day of your life.
  • 2:00 AM: Wake up, drink hot tea, and force down some breakfast.
  • 3:00 AM: Headlamps on. You start climbing the glacier in the dark, roped up.
  • Dawn: You reach the base of the headwall. The sky lights up. You put on your jumar and start the steep climb.
  • Summit: After the ridge, you are there. Embrace your guide. Take photos. You are above 8,000-meter peaks.
  • Descent: The most dangerous part. Rappel down the headwall and carefully pick your way back to High Camp, then all the way down to Chhukung. You will be walking for 12-14 hours .

Part 3: The Journey Home

Days 13-17: The Retrace: Follow the same route back down the valley to Lukla, celebrating each step with decreasing altitude. Fly back to Kathmandu for a well-deserved hot shower and a steak dinner .

Chapter 5: Gearing Up – The Ultimate Packing List

Packing for Island Peak is a science. You need to be warm, safe, and mobile. You can rent heavy technical gear (boots, down suit) in Kathmandu or Chhukung to save on luggage costs .

The Layering System

  • Base Layers (Wicking): 2-3 long-sleeve merino wool tops, 2 pairs thermal bottoms. NO COTTON .
  • Mid Layers (Insulation): A fleece jacket, a light-weight down jacket (for camp), and a heavy-weight down suit or expedition parka for the summit push .
  • Shell Layer (Protection): A waterproof/breathable Gore-Tex jacket and pants. This is your shield against wind and snow .

The Feet

  • Mountaineering Boots: The most important decision. You need insulated, double-plastic boots rated to at least -20°C (e.g., La Sportiva G2 SM, Scarpa Phantom Tech) .
  • Socks: Liner socks (thin silk/synthetic) to prevent blisters, and thick wool trekking socks. Pack at least 5 pairs.
  • Gaiters: To keep snow out of your boots .

Technical Gear

  • Crampons: 12-point steel, must be compatible with your boots .
  • Ice Axe: A technical ice axe (50-60cm) .
  • Harness: An alpine climbing harness with adjustable leg loops .
  • Helmet: UIAA/CE certified .
  • Carabiners & Slings: 4 locking screw-gate carabiners, 2 non-locking, 2 prusik loops .
  • Ascender (Jumar): For climbing the fixed ropes .
  • Belay Device (ATC/Figure 8): For rappelling down .

Accessories (Critical)

  • Headlamp: With fresh batteries and spares. Essential for the 3 AM start .
  • Sunglasses & Goggles: Category 4 glacier glasses for the snow, and ski goggles for the windy summit push .
  • Sunscreen & Lip Balm: SPF 50+. The sun at altitude is brutal.
  • Water Bottles: 1-liter wide-mouth Nalgene bottles are best. They won’t crack when they freeze, and you can put hot water in them at night to put in your sleeping bag .
  • Thermos: For hot drinks on summit morning.

Chapter 6: Stories from the Ice – A Personal Reflection on the Summit Push

To make this guide truly human, let’s step into the boots of a climber on that final morning.

The 2 AM alarm is a wretched sound. You are sleeping at 5,600 meters in a tiny tent, your breath frosting the inside of the fabric. You are wearing every layer you own, and you are still cold. Your mind races: Why am I doing this?

But then you unzip the tent. The sky is an explosion of stars, so close you feel you could touch them. The jet-black silhouette of Lhotse looms overhead. Your guide, Phurba, hands you a cup of sweet, hot tea. “Okay, sir?” he asks, with a smile that suggests he has done this a hundred times. You nod, because it’s easier than explaining the fear.

You click on your headlamp and join the chain of lights snaking up the glacier. The only sounds are the crunch of crampons on ice and your own heavy breathing. You focus on the beam of light in front of you, placing one foot in front of the other. “Climb high, sleep low,” you mutter, a mantra against the fatigue.

You reach the base of the headwall just as the sky turns from black to deep blue, then pink. You look up. It is a wall of blue ice, stretching up into the clouds. It is terrifying. Phurba clips you into the fixed rope. “Jumar up. Don’t look down.” You kick your front points into the ice, slide the jumar up the rope, and stand. Kick, slide, stand. The world narrows to the next kick, the next inch. Your arms burn. Your lungs burn. But you feel a fierce, primal joy.

Then, suddenly, the angle eases. You are over the wall. The summit ridge stretches before you, a knife-edge of snow. You walk it carefully, deliberately, and then… there is nowhere else to go. You are on top.

The wind is howling, but you don’t feel it. You are wrapped in the warmth of achievement. Everest is a plume of snow to the north. Makalu floats on the eastern horizon. Ama Dablam, that perfect peak you have stared at for days, is now far below you. You hug Phurba. You have done it. The “island in the sky” is under your feet.

The descent is a long, brutal trudge. The euphoria fades, replaced by exhaustion. Your knees scream. You trip on your crampons. The trail back to Chhukung seems to go on forever. But when you finally collapse into a teahouse chair and someone puts a cold beer in your hand, you feel a deep, bone-level satisfaction. You are a different person than the one who left.

Conclusion: More Than Just a Summit

Climbing Island Peak is a commitment. It requires your money, your time, your sweat, and your courage. It is a journey through the heart of Sherpa culture, past prayer flags and ancient monasteries, to the very edge of the earth’s ability to support human life.

It is a profound teacher. It teaches you patience during acclimatization, resilience in the face of exhaustion, and humility in the face of the mountains. It strips away the noise of modern life and leaves you with something essential: the rhythm of your breath, the support of your team, and the raw beauty of the natural world.

Whether you stand on the summit or make the wise decision to turn back, you will leave the Khumbu with a new understanding of yourself. So, train hard, pack smart, and go with respect. The island is waiting.

Frequently Asked Questions (FAQs)

Q: Is Island Peak a “walk-up”?
A:
Absolutely not. While it is considered a trekking peak, it involves steep ice climbing (using ropes and jumars), glacier travel, and serious exposure. It is a mountaineering expedition .

Q: Do I need prior climbing experience?
A:
While some do it as their first climb, it is highly recommended to have experience with basic cramponing and altitude. At a minimum, you should be extremely fit and attend the guide’s training sessions with focus .

Q: What if I get altitude sickness?
A:
Your guides are trained to spot symptoms. The only treatment for severe AMS is immediate descent to a lower altitude. Always be honest with your guide about how you are feeling .

Q: Can I rent gear in Nepal?
A:
Yes. You can rent almost everything in Kathmandu (boots, down suit, sleeping bag, crampons). The quality varies, so rent from a reputable shop. It is a great way to save money and luggage space .

Q: How heavy is my pack?
A:
Porters will carry your main duffel (up to 12-15kg) during the trek. You will carry a daypack (30-40L) containing your water, snacks, camera, and extra layers. On summit day, your daypack will be light but vital. Have a safe journey make fun!

Gosaikunda Lake:A Holy Journey to Lord Shiva’s Home in the Sky

Have you ever dreamed of visiting a place that feels like it’s floating in the clouds? A place where the water is so blue it looks like someone poured the sky into a giant bowl, and the mountains stand like ancient guards watching over everything?

Welcome to Gosaikunda Lake.

Tucked away high up in the mountains of Nepal, at a place called 4,380 meters above sea level, lies this magical lake. To get there, you have to walk for days. It’s cold. It’s tough. Your legs will ache and you’ll struggle to breathe because the air is so thin. But when you finally stand there, looking at those sacred waters, you’ll understand why people have been making this journey for thousands of years.

This is not just a lake. It’s a story. It’s a prayer. It’s an adventure. And today, I’m going to tell you everything about it.

The Story Behind the Lake

Let me take you back a really long time ago. We’re talking about the beginning of everything, according to Hindu stories.

Once upon a time, the gods (we call them Devas) and the demons (Asuras) decided to work together. Yes, you heard that right. The good guys and the bad guys joined hands because they wanted something special. They wanted to churn the great cosmic ocean to get a magic drink called Amrit. If you drank this Amrit, you would live forever.

So they started churning. They used a huge mountain as their stick and a giant snake as their rope. They pulled and pulled, and the ocean began to swirl. Many wonderful things came out of the ocean. But then, something terrible happened.

A dark, poisonous cloud rose from the depths. It was called Halahala. This was no ordinary poison. It was so powerful, so deadly, that just breathing near it could destroy the entire world. The gods and demons panicked. They ran away, screaming for help. The heat from the poison was burning everything.

Who could possibly save them? There was only one person powerful enough. Lord Shiva.

Shiva, the great god who sits in meditation high in the Himalayas, saw the suffering. He saw that all of creation was about to end. Without thinking twice, he stepped forward. He opened his mouth and swallowed the poison.

But he didn’t swallow it all the way. He held it in his throat. Why? Because he wanted to save the world but also protect his own body. The poison was so strong that it turned his neck blue. That’s why he is also called Neelkantha, which means “the one with the blue throat.”

Can you imagine the burning sensation? Having poison stuck in your throat? Shiva was in agony. The heat was unbearable. He needed relief. He needed cold. So he came up to the mountains, to a place he loved, and struck the ground with his mighty trident, his Trishul.

Where the trident hit the earth, water gushed out. It was cool, clean, and pure. It filled the hole and became a lake. Shiva drank the water and bathed in it, and finally, the burning stopped. That lake was Gosaikunda.

Isn’t that a beautiful story? Every time I think about it, I imagine Shiva standing there, tired but relieved, surrounded by snow and silence. And that’s why people come here. To bathe in the same water that cooled Lord Shiva’s throat. To wash away their own pains. To feel close to something divine.

A Special Place for Special People

Gosaikunda is not just for Hindus. Yes, it’s a very important place for them, especially for those who worship Shiva. But people from other religions, especially Buddhists, also respect this place deeply. The mountains around here are home to many Buddhist communities, and you’ll see prayer flags fluttering in the wind, sending good wishes across the land.

The lake is surrounded by other smaller lakes. In fact, there are said to be 108 lakes in this area. That number, 108, is very special. In Hinduism and Buddhism, it represents the universe, the wholeness of everything. Each lake has a name. There’s Saraswati Kunda for the goddess of knowledge. There’s Bhairav Kunda for the fierce form of Shiva. It’s like a family of lakes, each with its own personality and power.

If you visit during the full moon in August, you will see something amazing. That day is called Janai Purnima, or the festival of the sacred thread. Thousands and thousands of people walk up here. Old people, young children, everyone. They come to take a holy dip in the lake. They believe that bathing here washes away all their sins and blesses them with good health and happiness.

The scene is unbelievable. The usually quiet lake becomes a sea of people. You hear chanting, ringing bells, and prayers. Pilgrims offer coins, flowers, and food to the gods. They tie sacred threads around their wrists. The energy is electric, even though you’re so high up in the cold mountains. It’s a feeling you’ll never forget.

Why You Should Go There (Even If You’re Not Religious)

Okay, so maybe you’re not into mythology. Maybe you don’t believe in gods and goddesses. That’s fine. Gosaikunda has something for you too.

This place is a trekker’s dream. Imagine walking through forests of rhododendron, Nepal’s national flower. In spring, these trees explode with red and pink flowers. It’s like walking through a painting. You’ll cross streams gushing with icy water. You’ll climb stone steps carved into the hillsides by people long ago. You’ll pass through villages where life is simple and people smile at you even though they have very little.

Every step you take brings you higher. The air gets thinner. Your breath gets heavier. But the views get better. You see snow-capped peaks appearing on the horizon. You see yaks grazing on tough grass. You hear the wind whistling through the prayer flags.

And then, after days of walking, you finally reach the top. You see the lake.

It’s so blue. Not the blue of a swimming pool. It’s a deep, rich, almost unreal blue. Surrounded by brown and grey mountains, with patches of snow, the lake sits there like a precious jewel. The water is so cold it will numb your fingers instantly. But you don’t care. You just sit there and stare.

That feeling, my friend, is worth every step of the journey. It’s peace. It’s accomplishment. It’s awe. It’s realizing how small you are, but also how amazing it is to be alive.

How to Get There: The Road to Heaven

So, you’re convinced. You want to go. Let’s talk about how to actually do it.

First, you have to get to Nepal. You’ll probably fly into Kathmandu, the capital city. Kathmandu is a crazy, busy, colorful place. Spend a day or two there. Visit the temples. Eat the food. Get ready for your adventure.

From Kathmandu, you need to get to a town called Dhunche. It’s about a 7-8 hour drive. The road is bumpy. It winds through mountains and along rivers. You’ll be tired when you get there. But that’s where your trek begins.

There are two main ways to do the Gosaikunda trek.

The Short and Sweet Way

If you don’t have much time, you can do a shorter trek. You start in Dhunche and walk to a place called Chandanbari. Then you go to a beautiful lake called Bhairav Kunda. From there, you climb up to Lauribina Pass and then down to Gosaikunda. After visiting the lake, you can return the same way. This takes about 5 to 7 days.

The Long and Beautiful Way

If you have more time and you want to see more, take the longer route. This one goes through the famous Langtang Valley. The Langtang Valley is called the “Valley of Glaciers.” It’s stunning. You walk through dense forests, cross rivers on suspension bridges, and stay in small teahouses run by friendly local families.

You go from Dhunche to Syabrubesi, then to Lama Hotel, then to Langtang village, then to Kyanjin Gompa. From there, you cross a high pass called Lauribina La to reach Gosaikunda. This route takes about 10 to 14 days. It’s harder, but the views are even more incredible.

What’s a Teahouse?

You might be wondering, “Where do I sleep?” Don’t worry, you don’t need to carry a tent. Along the trekking routes in Nepal, there are small lodges called teahouses. They are simple. You get a small room with a bed and a blanket. Sometimes the walls are just plywood. The toilet might be outside. But they are warm, safe, and the food is good.

You’ll eat dal bhat (rice and lentil soup) mostly. It’s the perfect food for trekkers. It gives you energy and keeps you warm. You’ll also find noodles, soup, and tea. Lots and lots of tea. Ginger tea, milk tea, black tea. It’s the best thing after a long day of walking.

When to Go: Picking the Right Time

The mountains have seasons, and you need to pick the right one.

The Best Time: Autumn (September to November)

This is the perfect time. After the summer rains, the air is clear and clean. The skies are blue. You can see the mountains so clearly they look like you can touch them. The weather is not too hot and not too cold. During the day, you might even walk in just a t-shirt. At night, it gets cold, but that’s okay. This is when most people go.

The Second Best Time: Spring (March to May)

Spring is also wonderful. The weather is getting warmer. The best part is the flowers. The rhododendons bloom, and the hillsides turn red and pink. It’s beautiful. Sometimes in spring, there can be hazy skies, but it’s still a great time to trek.

The Time to Avoid: Winter (December to February)

Winter is cold. Really cold. At Gosaikunda, the temperature drops way below freezing. The lake might even freeze over. Snow blocks the trails. It’s dangerous for normal trekkers. Only go in winter if you are very experienced and have proper gear. And even then, be careful.

The Time to Really Avoid: Monsoon (June to August)

This is the rainy season. It rains almost every day. The trails become slippery mud. Leeches come out and suck your blood (yuck!). Landslides can block the paths. The views are cloudy. Plus, it’s the hottest time of year, so you sweat in the rain. Not fun. Don’t go in monsoon unless you really love a challenge.

What You Need to Take: Packing Smart

You don’t need to carry your whole house. But you need the right things. Let’s make a simple list.

Clothes

  • Base Layer: This is the layer that touches your skin. Get thermal tops and bottoms. They keep you warm and dry.
  • Mid Layer: This is for insulation. A fleece jacket or a light down jacket is perfect.
  • Outer Layer: This is your shield. You need a waterproof and windproof jacket. It might snow or rain anytime.
  • Trekking Pants: Comfortable pants that dry quickly. Don’t wear jeans. If jeans get wet, they are heavy and cold and take forever to dry.
  • Warm Hat and Gloves: Your head and hands get cold first. Pack a woolen hat and warm gloves. Bring an extra pair of gloves in case one gets wet.
  • Socks: Bring at least 3 or 4 pairs of good, thick trekking socks. Keep your feet happy.

Gear

  • Good Hiking Boots: This is the most important thing. Your boots should be waterproof and comfortable. Break them in before you go. Don’t wear new boots on the trek.
  • Backpack: A comfortable backpack that fits you well. Around 40-50 liters is enough.
  • Sleeping Bag: Teahouses give you blankets, but they can be old and thin. Bring your own sleeping bag. Make sure it’s rated for cold temperatures (at least -10°C or lower).
  • Water Bottle: Bring a thermos or a metal bottle. You can fill it with hot water at night to keep you warm in your sleeping bag.
  • Headlamp: With fresh batteries. The teahouses can be dark at night.

Other Important Stuff

  • Sunscreen and Sunglasses: The sun at high altitude is very strong. It can burn your skin and hurt your eyes, especially when it reflects off snow.
  • Lip Balm: Your lips will get dry and crack. Bring lip balm with SPF.
  • First Aid Kit: Bring basic medicines. Painkillers, bandages, antiseptic cream, and most importantly, medicine for upset stomach. Also bring Diamox. This helps with altitude sickness. Talk to a doctor before you go.
  • Toilet Paper and Wet Wipes: Teahouses might not have these. Always carry your own.
  • Power Bank: Electricity is limited in the mountains. You might only get a few hours to charge your phone, and it might cost money. Bring a fully charged power bank.
  • Trekking Poles: These are a lifesaver. They help your knees on the downhill and give you balance on rough trails.

The Danger You Must Respect: Altitude Sickness

This is the most serious part of the trek. Gosaikunda is very high. At 4,380 meters, the air has much less oxygen than what you’re used to. Your body needs time to adjust. If you go up too fast, you can get altitude sickness.

What Does It Feel Like?

At first, you might just have a headache. You might feel tired, dizzy, or sick to your stomach. You might not want to eat. This is mild altitude sickness. It’s common. The cure is to rest, drink lots of water, and not go higher until you feel better.

The Dangerous Kind

If you ignore the mild symptoms and keep climbing, you can get very sick. This is serious. You might have a really bad headache that won’t go away. You might vomit. You might feel confused or unable to walk straight. You might have trouble breathing, even when you’re resting.

This is a medical emergency. There is only one cure. You must go down immediately. Go to a lower altitude as fast as you can. Do not wait. Do not hope it will get better. Going down saves lives.

How to Avoid It

  • Go Slowly: This is the golden rule. Don’t rush. Walk slowly. Take breaks. Enjoy the views. Let your body get used to the height.
  • Drink Water: Drink lots and lots of water. Staying hydrated helps.
  • Don’t Climb Too High Too Fast: A good rule is to not sleep more than 300-500 meters higher than where you slept the night before.
  • Listen to Your Body: If you feel bad, tell someone. Rest for a day. If you don’t feel better, go down. There is no shame in turning back. The mountain will still be there another time.

Permits and Paperwork

You can’t just walk into the mountains. You need permission. It’s easy to get, but you must have it. There are two main permits.

  1. Langtang National Park Entry Permit: Gosaikunda is inside Langtang National Park. You need this permit to enter. You can get it at the Nepal Tourism Board office in Kathmandu or at the park entrance in Dhunche. It costs about 3,000 Nepali Rupees (around 25 US dollars).
  2. TIMS Card (Trekkers’ Information Management System): This is like a registration card for trekkers. It helps keep you safe. If there’s an emergency, they know where you are. You can get this in Kathmandu through a trekking agency or at the Nepal Tourism Board. It costs about 2,000 Rupees (around 17 US dollars) for individual trekkers.

Keep these permits safe. You will be checked at several points along the trail.

The People You’ll Meet

One of the best parts of trekking in Nepal is the people. The trails are full of wonderful humans.

First, there are the locals. The people who live in these mountains are mostly from the Tamang and Sherpa communities. They are some of the kindest people on earth. They run the teahouses. They cook your food. They smile at you even when they are working hard. Many of them are Buddhists, and you’ll see their monasteries and prayer wheels along the way.

Then, there are the other trekkers. You’ll meet people from all over the world. Germany, Australia, Japan, America, everywhere. You’ll share stories over dinner. You’ll cheer each other on. You might make friends for life.

And of course, there are the guides and porters. Many trekkers hire them. A guide knows the trails, the weather, and the culture. They keep you safe and teach you things. A porter carries your heavy bag. These are strong, amazing people who make a living helping others see their beautiful homeland. If you hire a porter, treat them with respect. Pay them fairly. Give them food and a place to sleep.

Reaching the Top: The Big Moment

After days of walking, you finally reach Lauribina Pass. This is the last big climb before the lake. It’s steep and tiring. Your heart pounds in your chest. Every step is hard. You stop to catch your breath every few minutes.

Then, you make it over the pass. And there it is.

Gosaikunda.

It’s bigger than you imagined. The water is so clear and so blue. The mountains rise up on all sides, some with snow on their peaks. It’s quiet. So quiet you can hear the wind and the sound of prayer flags flapping. The air is cold and thin and clean.

You walk down to the shore. There’s a small temple there. Pilgrims are praying. Bells are ringing. You dip your hand in the water. It’s freezing, so cold it hurts, but you don’t pull away. You feel something. Peace, maybe. Or awe. Or just the simple joy of being alive in such a beautiful place.

You stand there for a long time, just looking. You think about the story of Shiva and the poison. You think about all the people who walked this same path for thousands of years. You think about how far you’ve come.

It’s a moment you will remember forever.

Coming Back Down

What goes up must come down. The return trek is faster, but in some ways, it’s harder on your body. Your knees take a beating on the downhill. But it’s also a time to look back at what you’ve done. You pass the same villages and teahouses, but now you’re a different person. Stronger. More peaceful.

When you finally get back to Dhunche and climb into a jeep for the bumpy ride back to Kathmandu, you’ll feel strange. The noise of the city will shock you. The crowds will feel overwhelming. You’ll miss the mountains. You’ll miss the quiet. You’ll miss the simple life of walking, eating, and sleeping.

This is normal. The mountains change you. They get inside you. And soon, you’ll start dreaming of going back.

A Few Last Tips

Before you go, here are some small things to remember.

  • Bring Cash. There are no banks or ATMs in the mountains. You need cash to pay for your food, your room, and anything else you buy. Bring enough Nepali Rupees.
  • Charge Your Phone. Teahouses often charge money for electricity. It might be a few hundred rupees per hour. Bring your power bank.
  • Be Respectful. This is a holy place for many people. Dress modestly, especially near the lake. Don’t litter. Don’t pollute the water. Take your trash with you.
  • Buy a Local SIM Card. You can get a Nepali SIM card in Kathmandu. In some higher places, you might not have signal, but in many villages along the trail, you will.
  • Get Travel Insurance. This is very important. Make sure your insurance covers high-altitude trekking (up to 5,000 meters) and emergency helicopter evacuation. If something goes wrong, a helicopter rescue costs thousands of dollars. Insurance will save you.

Conclusion: The Lake That Calls You Back

Gosaikunda is more than a destination. It’s a journey of the body, mind, and spirit. Whether you go for the legend of Shiva, the challenge of the trek, or just the beauty of the mountains, you will find something there that speaks to you.

You will find hardship. You will find cold and tiredness and doubt. But you will also find warmth, kindness, and breathtaking beauty. You will find peace.

So pack your bags. Lace up your boots. Take a deep breath. And go. The mountains are waiting. Lord Shiva’s sacred lake is waiting. And the adventure of a lifetime begins with a single step.

Happy trekking, friend. See you on the trail. Have a wonderful Journey.

My Solo Annapurna Circuit Trek: 230km of Himalayas, Hot Springs, and High Passes

The Annapurna Circuit, often hailed as one of the world’s greatest long-distance treks, is a journey of breathtaking diversity and profound challenge. This classic route in the Nepalese Himalayas takes you on a 160-230 km loop around the majestic Annapurna Massif, leading you through verdant subtropical forests, traditional Gurung and Manangi villages, high-altitude deserts, and finally to the dizzying heights of the Thorong La Pass (5,416m) .

This comprehensive guide is designed to provide you with all the essential information for planning your adventure, covering everything from permits and itineraries to detailed packing lists and critical safety advice.

Trip Overview and Statistics

Before lacing up your boots, it’s crucial to understand the scale of the trek. The Annapurna Circuit is not just a walk in the hills; it’s a strenuous expedition that requires respect and preparation.

Feature Details

  • Location Annapurna Region, central Nepal
  • Total Length 160-230 km (100-145 miles), depending on route and transport use .
  • Maximum Altitude Thorong La Pass at 5,416 m (17,769 ft) .
  • Duration Typically 12-20 days .
  • Difficulty Challenging due to high altitude, long days, and remote terrain.
  • Accommodation Teahouses (simple lodges) .
  • Best Seasons Spring (March-May) and Autumn (October-November) .

The route encircles the Annapurna Massif, providing close-up views of some of the world’s highest and most spectacular peaks, including Annapurna I (8,091m), Dhaulagiri (8,167m), Machhapuchhre (6,993m), and Manaslu (8,163m) . The journey is a feast for the senses, offering a unique blend of natural beauty and cultural richness.

Best Time to Trek the Annapurna Circuit

Choosing the right time to trek is paramount for a safe and enjoyable experience. The weather in the Himalayas is seasonal and dictates trail conditions.

Autumn (September – November): This is the most popular and highly recommended season. The weather is stable with clear, blue skies offering unrivaled mountain views. The days are warm at lower elevations, but nights are cold. This is the peak season, so teahouses are busier, and booking ahead is wise .

Spring (March – May): The second-best time to trek. The weather is warmer, and the lower trails burst into color with blooming rhododendrons. However, haze can sometimes obscure the long-distance views, and there’s a chance of afternoon rain .

Winter (December – February): This is a challenging time for experienced trekkers only. The trail is covered in deep snow, and the Thorong La Pass is frequently closed due to avalanche risk and extreme cold, with temperatures dropping as low as -20°C .

Monsoon (June – September): Generally not recommended. While the northern part of the circuit lies in a rain shadow, the trekking trails can be wet, slippery, and leech-infested. Landslides are a common risk, and mountain views are often obscured by clouds .

Detailed Day-by-Day Itinerary (10-14 Days)

The classic Annapurna Circuit is walked counter-clockwise. This direction is safer and more sensible as it allows for a more gradual ascent, giving your body time to acclimatize to the altitude before tackling the Thorong La .

Here is a standard 14-day itinerary, which includes the popular side trip to the stunning Tilicho Lake.

Day Route Altitude Trekking Hours Highlights & Notes

  • Day 01 Drive from Kathmandu (1,400m) to Besisahar (760m) 760m 7 hrs drive Scenic drive along the Trishuli and Marsyangdi rivers .
  • Day 02 Drive from Besisahar to Chame (2,650m) 2,650m 5-6 hrs drive A bumpy but beautiful 4WD journey into the mountains. First views of Annapurna II .
  • Day 03 Trek from Chame to Upper Pisang (3,300m) 3,300m 5-6 hrs Trek through pine forests, cross suspension bridges, and see the massive Paungda Danda rock face .
  • Day 04 Trek from Upper Pisang to Manang (3,540m) 3,540m 5-6 hrs Stunning high route via Ghyaru and Ngawal villages with breathtaking views of the Annapurna range. Visit the Ngawal Monastery .
  • Day 05 Acclimatization Day in Manang 3,540m 3-4 hrs Crucial for safety. A short hike to Gangapurna Lake or the Manang Viewpoint (following ‘climb high, sleep low’) .
  • Day 06 Trek from Manang to Tilicho Base Camp (4,150m) 4,150m 5-6 hrs Leave the main circuit for the dramatic Tilicho Valley .
  • Day 07 Trek from Tilicho BC to Tilicho Lake (4,920m) and back to Kharka 4,150m (sleep) 7-8 hrs A challenging day to the world’s highest lake. The views of Tilicho Peak are unforgettable. Descend to sleep lower .
  • Day 08 Trek from Kharka to Yak Kharka (4,110m) 4,110m 4-5 hrs Rejoin the main circuit and continue up the valley. Look out for blue sheep .
  • Day 09 Trek from Yak Kharka to Thorong High Camp (4,900m) 4,900m 4-5 hrs A short but steep climb to the final stop before the pass. The air is thin here .
  • Day 10 Trek from High Camp to Muktinath (3,800m) via Thorong La Pass (5,416m) 5,416m (max) 8-10 hrs The biggest day. An early start for a strenuous climb to the pass. Celebrate at the top before a long descent to the holy temple of Muktinath .
  • Day 11 Drive from Muktinath to Jomsom (2,750m) and fly/Drive to Pokhara 2,750m 20 min flight / 5-9 hrs drive A scenic flight or a long jeep ride through the dramatic Kali Gandaki Gorge back to the lakeside city of Pokhara.
  • Day 12 Free day in Pokhara 850m – Rest, explore Lakeside, or go paragliding. A well-deserved break .
  • Day 13 Drive or fly from Pokhara to Kathmandu 1,400m 7 hrs drive / 25 min flight Return to the bustling capital .
  • Day 14 Final Departure – – Transfer to the airport for your flight home .

Note: This is a suggested itinerary. Treks can be shorter (e.g., 10-12 days by skipping Tilicho Lake and using more jeep transport) or longer for a more relaxed pace .

Permits and Essential Paperwork

You cannot trek the Annapurna Circuit without the correct permits. These are checked at several points along the trail.

Annapurna Conservation Area Permit (ACAP): This is required for entering the Annapurna region. You can obtain it in Kathmandu or Pokhara, and at some entry points like Besisahar and Chame .

Trekkers’ Information Management System (TIMS) Card: This is a registration card aimed at trekker safety and managing trekking traffic.

To obtain these permits, you will typically need:

  • Your passport.
  • Two or more passport-sized photos .
  • The necessary fees (approximately 5000 NPR, but it’s best to bring extra cash) .

The Ultimate Annapurna Circuit Packing List

Packing smart is essential. You need to be prepared for everything from warm valley floors to freezing, windy passes, but your pack must remain light enough to carry comfortably. The golden rule is to pack layers.

Clothing: The Layering System

  • Base Layers (Moisture-Wicking):
  • 2-3 sets of thermal tops and bottoms (merino wool or synthetic). Avoid cotton .

Insulating Layers (Mid-Layers):

  • A fleece jacket for moderate warmth.
  • A lightweight, packable down jacket for evenings and high altitudes. This is non-negotiable .

Outer Layer (Shell):

  • A waterproof and windproof shell jacket with a hood (Gore-Tex or similar).
  • Waterproof trekking pants .
  • Trekking Apparel:
  • 2-3 lightweight, breathable trekking shirts (long-sleeved for sun protection).
  • 1-2 pairs of lightweight, quick-dry trekking pants (zip-offs are a popular choice) .

Footwear

  • Trekking Boots: Sturdy, waterproof boots with good ankle support. Crucially, they must be well broken-in before you arrive in Nepal to avoid blisters .
  • Camp Shoes / Sandals: A lightweight pair of sneakers or sandals to give your feet a rest in the teahouses .
  • Socks: 4-5 pairs of wool or synthetic trekking socks. Avoid cotton .

Essential Gear

  • Backpack: A 50-65 liter backpack if you are carrying your own gear. If you hire a porter, a 20-30 liter daypack is sufficient for daily essentials .
  • Sleeping Bag: A must. Teahouse blankets are often insufficient. A bag rated to -10°C to -15°C is recommended for autumn and spring. For winter, you’ll need a -20°C bag .
  • Trekking Poles: Invaluable for reducing stress on your knees during long descents and providing balance on rocky trails .
  • Headlamp: Essential for early morning starts to catch the sunrise at the pass and for navigating dark teahouses. Bring spare batteries .
  • Water Bottles/Bladder: Carry at least 2-3 liters of capacity. A hydration bladder is very convenient for drinking on the move .
  • Water Purification: Iodine tablets, a filter, or a Steripen. Do not drink untreated water .
  • Power Bank: Charging facilities in teahouses are available but often cost money and can be unreliable .

Health, Hygiene, and First Aid

  • Sun Protection: High-altitude sun is intense. Bring sunglasses (with high UV protection), a sun hat, and SPF 30+ lip balm and sunscreen .
  • Toiletries: Quick-dry towel, biodegradable soap, wet wipes, hand sanitizer, and toilet paper .
  • Personal First Aid Kit: Include blister care (Compeed, mole skin), pain killers (like Ibuprofen), Imodium for stomach upsets, and any personal prescription medications .
  • Altitude Sickness Medication: Consult your doctor about Diamox (Acetazolamide) , which can help prevent and lessen the symptoms of AMS .

Documents and Miscellaneous

  • Passport and Permits: Keep them safe and dry in a waterproof bag .
  • Travel Insurance Documents: Your insurance must cover high-altitude trekking (up to 5,500m) and emergency helicopter evacuation. This is not optional .
  • Cash (Nepalese Rupees): ATMs are non-existent on the trail. You need cash to pay for accommodation, food, and any incidentals .
  • Snacks: Energy bars, nuts, and chocolate to keep you going between meals .

Accommodation and Food on the Trail

The Annapurna Circuit is a “teahouse trek,” meaning you don’t need to carry a tent or cooking gear.

Teahouses: These are basic but comfortable lodges found in every village. They provide a bed (often just a mattress), a communal dining room with a stove for heat, and shared squat toilets. Rooms are basic and unheated. In busy seasons, it’s wise to arrive early to secure a spot .

The Teahouse System: There is an unwritten rule that trekkers are expected to eat their meals at the teahouse where they stay. In return, the room is often provided for free or at a very nominal cost .

Food: The food is plentiful and hearty, designed to fuel trekkers. The menu is extensive but repetitive, mostly centered on Nepali and Tibetan dishes.

Staples: Dal Bhat (lentil soup, rice, and vegetables) is the king of trekking food. It’s nutritious, filling, and often unlimited seconds are available.

Other Options: Noodle soups, fried rice, momos (dumplings), pasta, pizza, porridge, pancakes, and bread.

Drinks: Tea (milk tea, ginger tea), coffee, hot lemon, and hot chocolate are available. Soft drinks and beer are also sold but become progressively more expensive as you gain altitude.

Health, Safety, and Responsible Trekking

Your safety in the mountains is your own responsibility. Being informed and cautious is key.

  • Acute Mountain Sickness (AMS): This is a serious risk on the Annapurna Circuit due to the high altitude of the Thorong La. Symptoms include headache, nausea, dizziness, and loss of appetite.
  • Prevention: The only cure for AMS is descent. To prevent it, ascend slowly, include acclimatization days (like Day 5 in Manang), stay hydrated, and avoid alcohol .
  • Action: If symptoms are severe or worsen, you must descend immediately. Do not ascend further.
  • Weather and Trail Conditions: Himalayan weather is unpredictable. Be prepared for sudden changes, including snow and high winds, even in peak season. The trail can be affected by landslides. Listen to local advice and your guide .
  • Guides and Porters: While the trail is well-marked, hiring a guide can enrich your experience with local knowledge and ensure your safety. Hiring a porter not only lightens your load but also directly supports the local economy. If you hire a porter, remember they are a fellow human being—treat them with respect, ensure they have proper gear, and pay them a fair wage .
  • Travel Insurance: We cannot stress this enough. Your insurance policy must cover trekking up to 5,500-6,000 meters and helicopter rescue. Keep a copy of your policy details with you .

Responsible Trekking: The mountains are a fragile environment.

Leave No Trace: Pack out all your non-biodegradable trash. Use biodegradable soaps.

Conserve Resources: Hot water for showers often comes from firewood. Be mindful of your usage. Electricity for charging may come from solar power, which is limited .

Respect Local Culture: Dress modestly, especially when visiting monasteries. Always ask for permission before taking photos of people. Learn a few words of Nepali, like “Namaste” (hello) and “Dhanyabad” (thank you).

Highlights and Side Treks

The main circuit is just the beginning. Several side treks offer even more adventure.

Tilicho Lake: At 4,919 meters, this is one of the highest lakes in the world. The side trip adds 2-3 days to your itinerary but rewards you with a surreal landscape of towering peaks reflected in the deep blue water.

Ice Lake: A challenging day hike from Manang to a stunning frozen lake at 4,600m, offering fantastic panoramic views as an acclimatization exercise.

Muktinath Temple: A sacred site for both Hindus and Buddhists, this temple of eternal flame and 108 water spouts is a culturally fascinating place to explore after your pass crossing .

The Annapurna Circuit is more than just a trek; it is a life-changing journey through some of the most spectacular landscapes on Earth. With careful preparation, the right gear, and a spirit of adventure, it is an achievable dream for any determined trekker. So, start planning, pack your bags, and get ready for the adventure of a lifetime in the heart of the Nepalese Himalayas.

Translate »